How to Paint a Buffalo Plaid Pumpkin (Easy Craft!)
Happy Fall everyone! Wow, this year is really flying by! How is it already time to think about decorating pumpkins? Well, if you’re a fan of buffalo checks, I have a festive and easy craft project for you! Today, I’m going to share how to paint a buffalo plaid pumpkin!
*For your convenience, please note that this post may contain affiliate links. If you make a purchase after clicking my links below, I will receive a small commission (at no additional cost to you).
How to Paint a Buffalo Plaid Pumpkin:
If you want to try an easy DIY project for fall, this is the paint project for you!
Before I give you all the pumpkin painting details, I want to tell you that I’m joining a group of 8 talented bloggers for a Creative Craft Blog Hop hosted by Sara from Birdz of a Feather. When you’re finished here, be sure to check out all the amazing crafts listed at the end of this blog post!
Let’s Get Started with the Plaid Pumpkin Painting:
Supplies Needed for Your Pumpkins:
- Craft pumpkins (or any fake pumpkin)
- Craft paint – (I used off white, gray and black paint)
- Paint brush
Instructions to Paint Buffalo Plaid Pumpkins:
Step 1:
- Coat the craft pumpkins with a layer of white paint. (If your craft pumpkins are already white, you don’t have to paint them but I like the extra texture the paint adds).

For my pumpkins, I chose a creamier white to make them look a little more natural.
Step 2:
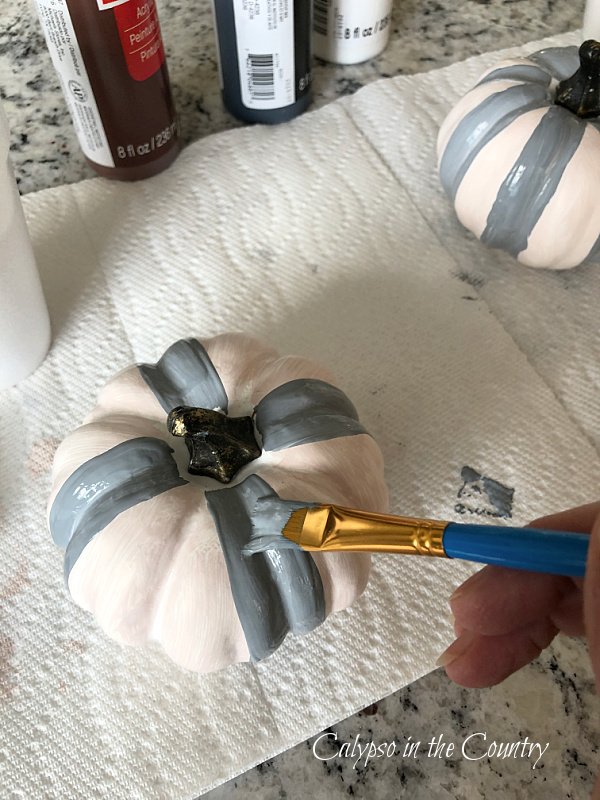
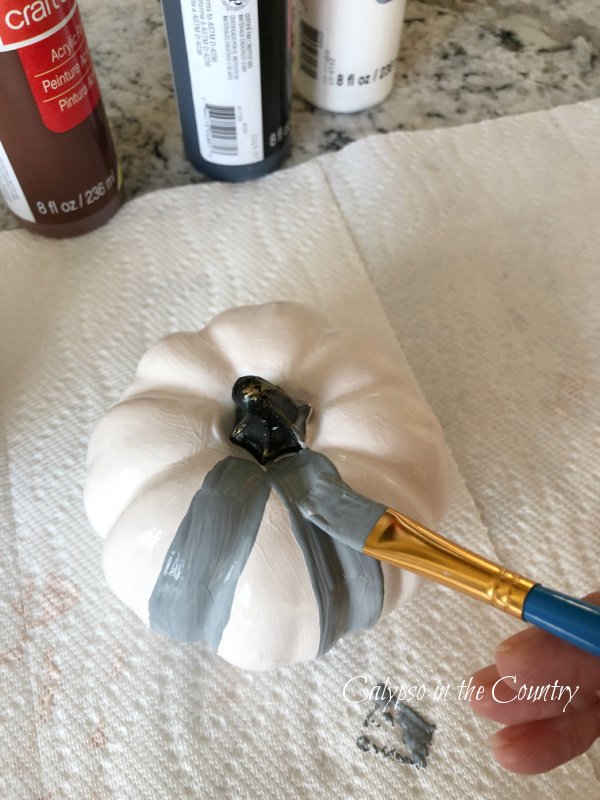
- With the gray paint, apply vertical wide stripes evenly down the sides of the pumpkin.
Even though I’ve seen people mark the stripes off with painter’s tape, I find it just as easy to paint free hand.
For your own pumpkin, you can decide which way is easier for you.
Step 3:
- Let the gray paint dry.

Step 4:
- Paint horizontal stripes across the pumpkin.

Step 5:
- Paint black squares where each horizontal and vertical stripe meets.

Step 6:
- Let the plaid painted pumpkins dry.
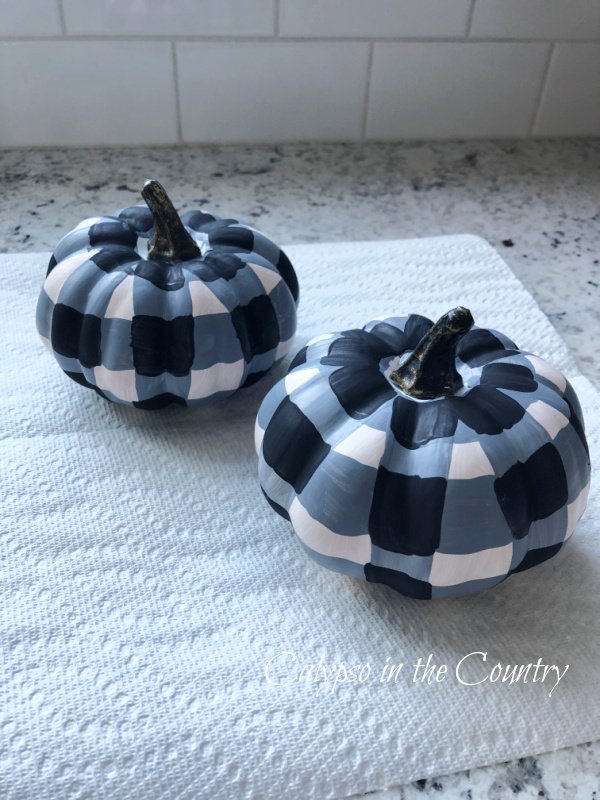
If you’re happy with the existing color of the pumpkin stem, just leave it. Otherwise, add a little paint to the stem.
Step 7:
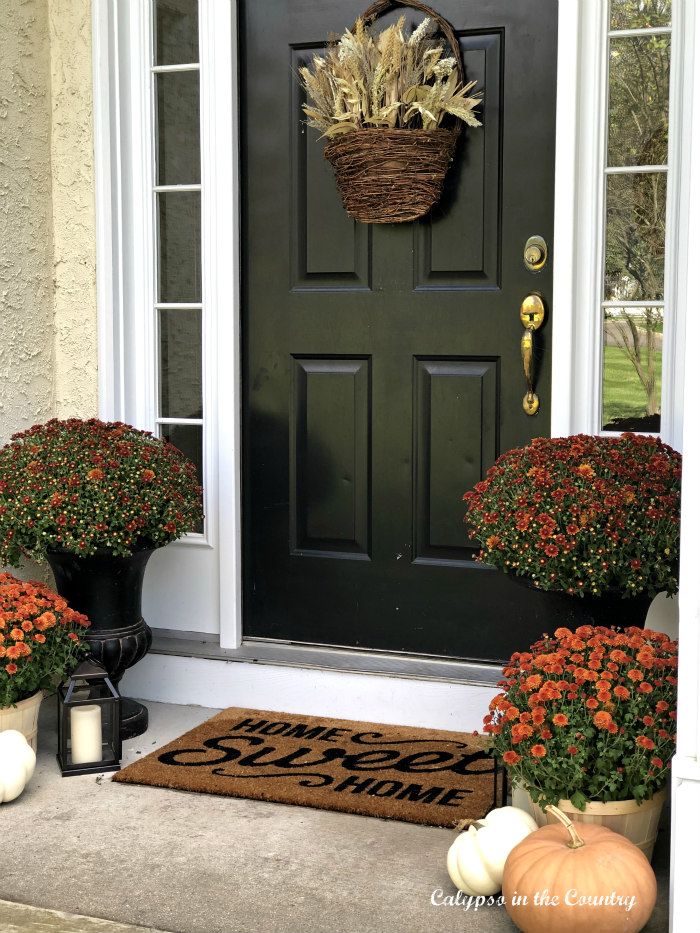
- Decorate with your buffalo check pumpkins!
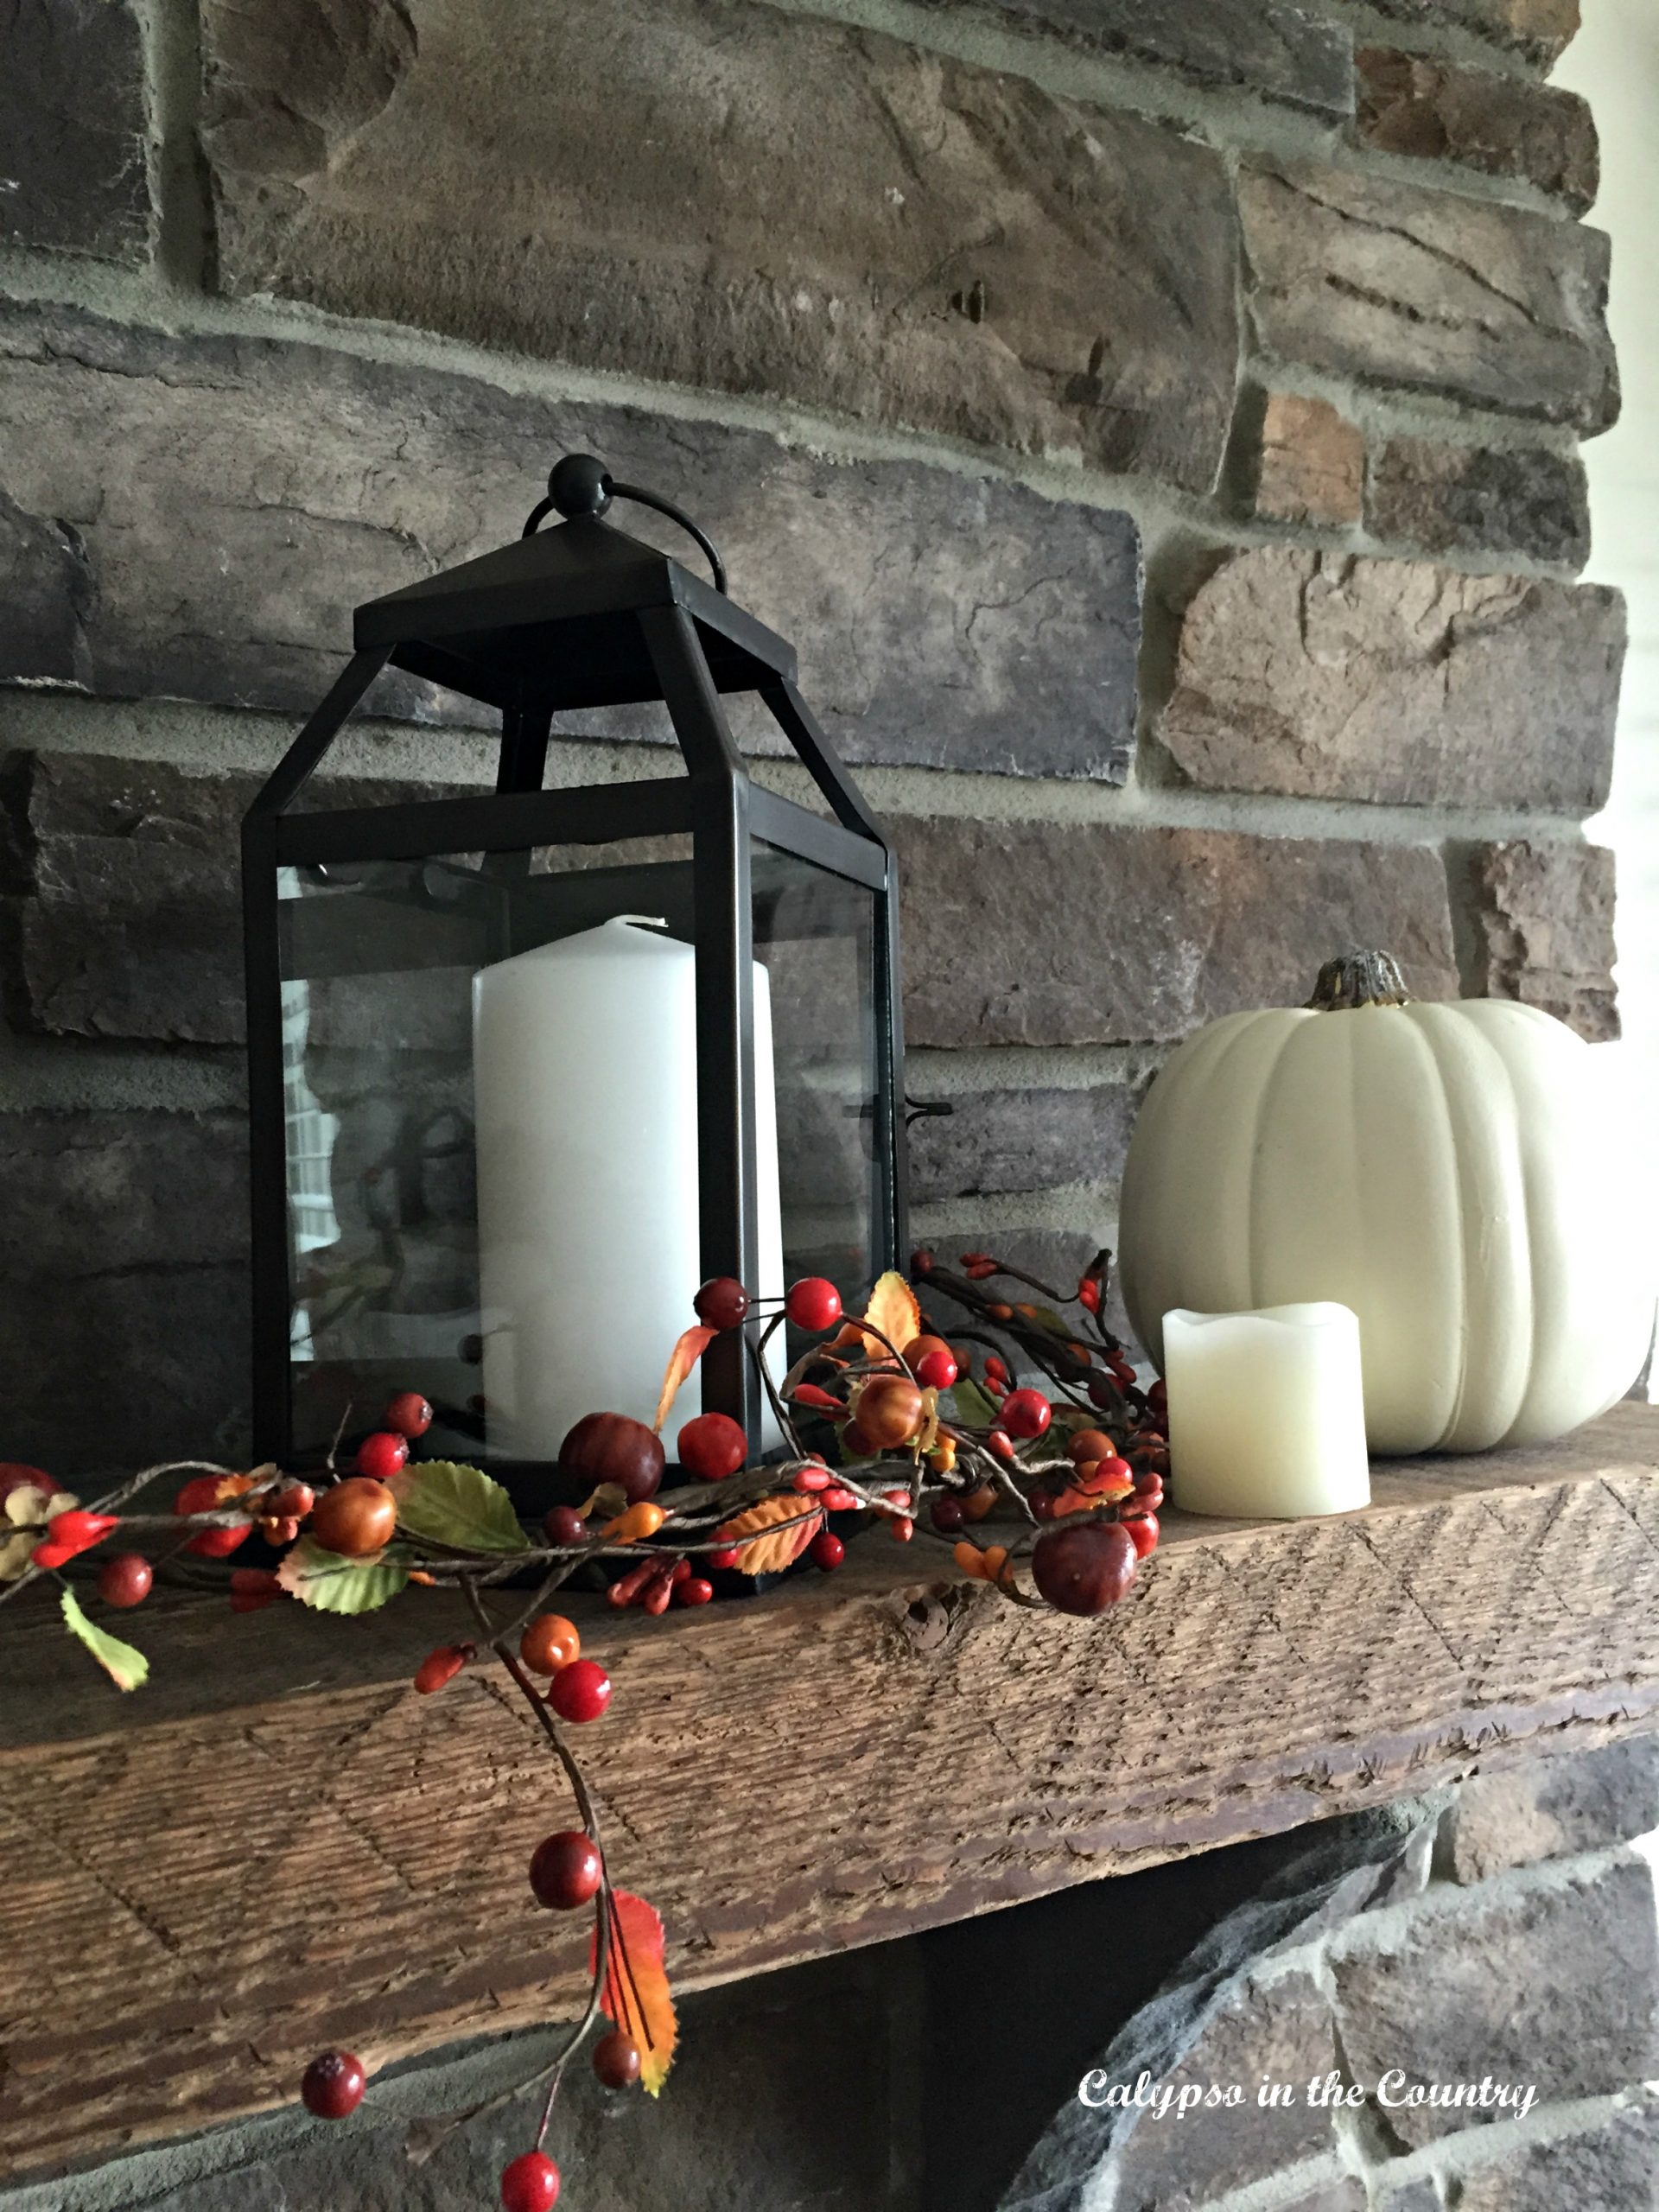
Last year, I decorated my fall mantel with black and white buffalo check pumpkins…

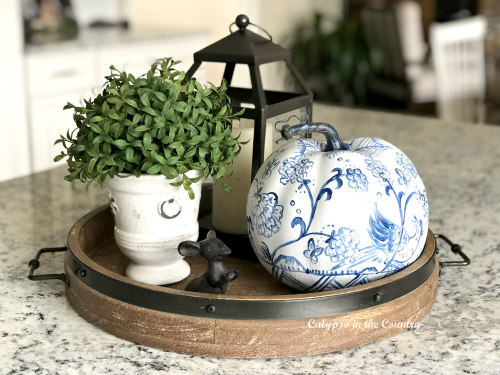
And the year before, I painted a blue buffalo check pumpkin for my fall dining room…

If you like this simple craft, head over to see more pumpkin ideas on my blog post – Pumpkin Decorations for Fall.
Hopefully, my pumpkin painting ideas will inspire you to try something new with your pumpkins this fall!
Now, head over to Bluesky at Home to see how Carol decorates her pumpkins with rope and twine!
Thanks to Sara from Birdz of a Feather for hosting this Creative Craft Hop! Once again, be sure to check out all the awesome crafts from the list below!

How to Paint a Buffalo Plaid Pumpkin
How to Decorate Pumpkins with Rope and Twine
Drip Painted Ginger Jar Tutorial
Creations A Spooky Centerpiece for Halloween
Will you be painting any pumpkins this fall?

Follow along so you don’t miss a post!
Subscribe by email – HERE
Pinterest/ Instagram / Facebook / Twitter


Shelley, your pumpkins looks amazing. Love your tutorial it is so easy to follow. Happy Fall!
Thanks Terrie! It’s the easiest DIY! Glad you like them – happy Fall!
I love plaid vibes for fall, Shelley! And you’ve given us a fun way to achieve a classic and charming look for pumpkins! Thanks for sharing a wonderful tutorial!
hi Shelley, your pumpkins turned out so cute! I have painted pumpkins, but never checked ones so thanks for the tutorial. Endless painted pumpkin possibilities!
Jenna
These are beautiful Shelley and look wonderful wth your Fall decor! Thanks for a great tutorial. I just love how painterly these look when they’re done free hand!
So cute, I love your buffalo plaid check pumpkins! They look great on your mantel and sprinkled in with your fall decor! Happy Fall!
Shelly, your painted pumpkins are just adorable! I am impressed with your freehand painting, too. 😉 Blessings, Cecilia @My Thrift Store Addiction
Shelley, you make this look so easy. I have the pumpkins to do this. I’ll have to try.
Love those! Super cute! 🙂
Can’t say that I’ll be painting any pumpkins this fall, but I do love yours!
Shelley, I love these and want to try to make them. It looks like you have a very steady hand to get the stripes nice and straight. I will concentrate very hard – and not drink any wine before I start to paint!
I love plaid pumpkins (well plaid anything for fall and winter). I wondered how painting plaid was done, thanks for the awesome tutorial. Your pumpkins are fabulous!
They look awesome… sorry bought some plaid ones last year… but will have to try this
This is such a cute idea, Shelley! Love that you can transform ordinary pumpkins into something more. Many smiles, Suzanne.
Cute pumpkins!
That is so funny, I just painted some plaid pumpkins! Mine were a pain and did not turn out, I am going to try your method!
Girl, you’re pro! You make it look so easy I want to give it a try! They’re so pretty. 🖤🖤
Shelley, I love these! Such a fun buffalo plaid look. . . and so much easier than I would have thought! Thank you for the tutorial.
Thanks so much for joining the Grace at Home party at Imparting Grace. I’m featuring you this week!
Thanks for sharing on Happiness is Homemade! These are adorable! I’d love for you to come over and share on my other link party as well. Traffic Jam Weekend is open now (Thursdays thru Sundays), and I think our readers would love this!
These are adorable. I can’t wait to give it a try. Thanks for sharing.
Lisa
Shelley, these are the cutest! I love painted projects like this – thanks for sharing!
Your pumpkins are so cute, Shelley!
Thanks Paula! I need to buy some more for this year!