Breakfast Tray Makeover – How to Update with Paint (An Easy DIY)
Breakfast in bed…such a luxury, right? Well, it can be even more luxurious when you get to enjoy breakfast on a beautiful tray! Today, I’m sharing my breakfast tray makeover…so maybe I’ll inspire you to update a tray of your own.
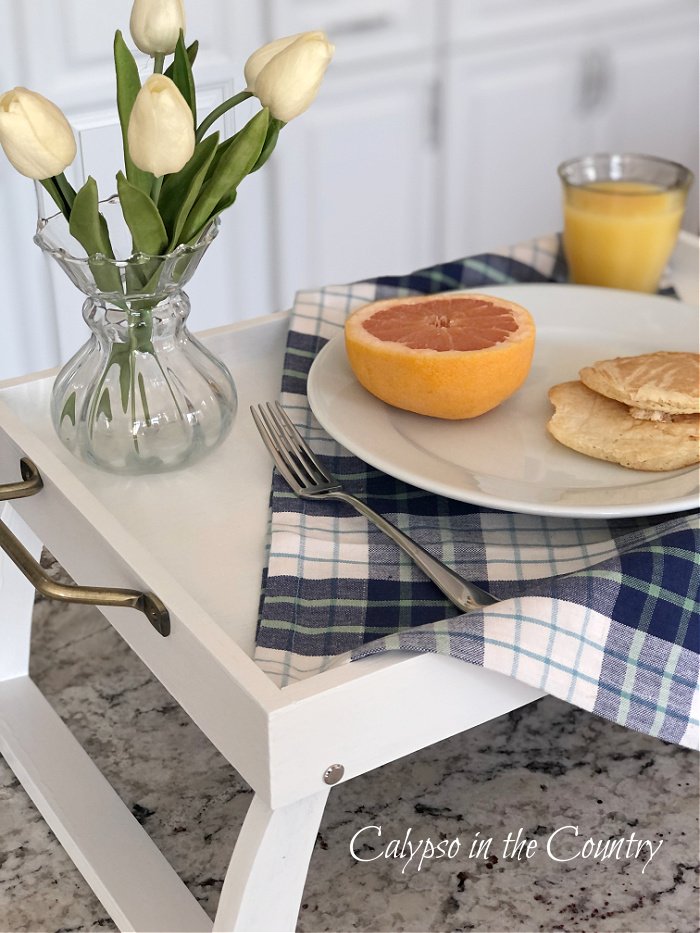
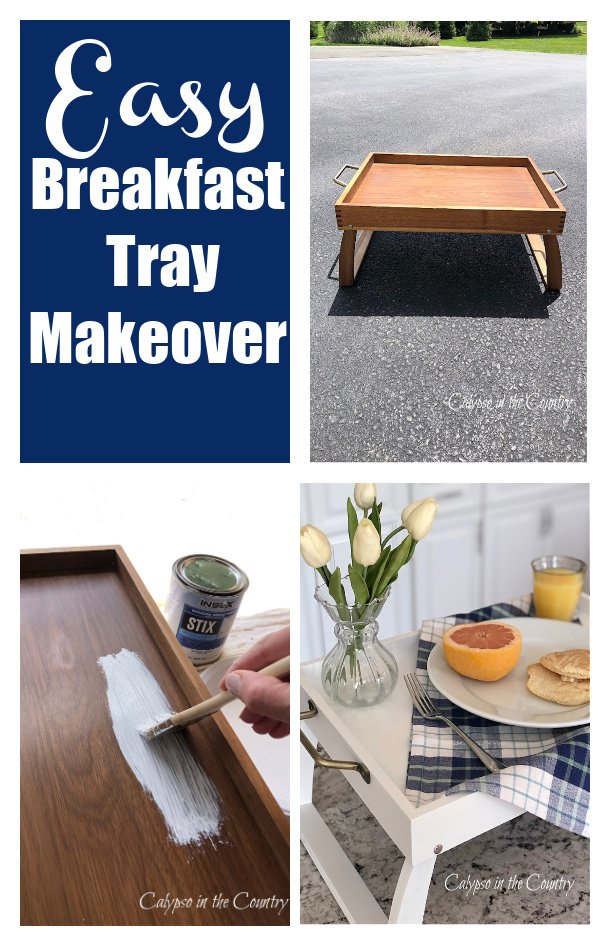
With some paint, I transformed a simple wooden tray into a pretty white breakfast tray. This makeover project was super easy and ended up looking very similar to expensive trays you’ll find in the stores.
*For your convenience, please note that this post contains affiliate links. If you make a purchase after clicking my links below, I will receive a small commission (at no additional cost to you).
Breakfast Tray Makeover with Paint:
Simply, follow these easy steps to update your own tray.
Believe me, if I can do this project, almost anyone can!
First, find a simple wooden bed tray with legs…
Years ago, I bought my tray in Target. If you’re looking for one, this tray seems to be their latest version. (It’s almost the exact size of mine and is also part of their Threshold line.) If that one sells out, this wooden tray is also cute. In fact, I might even like the handles better on that one.
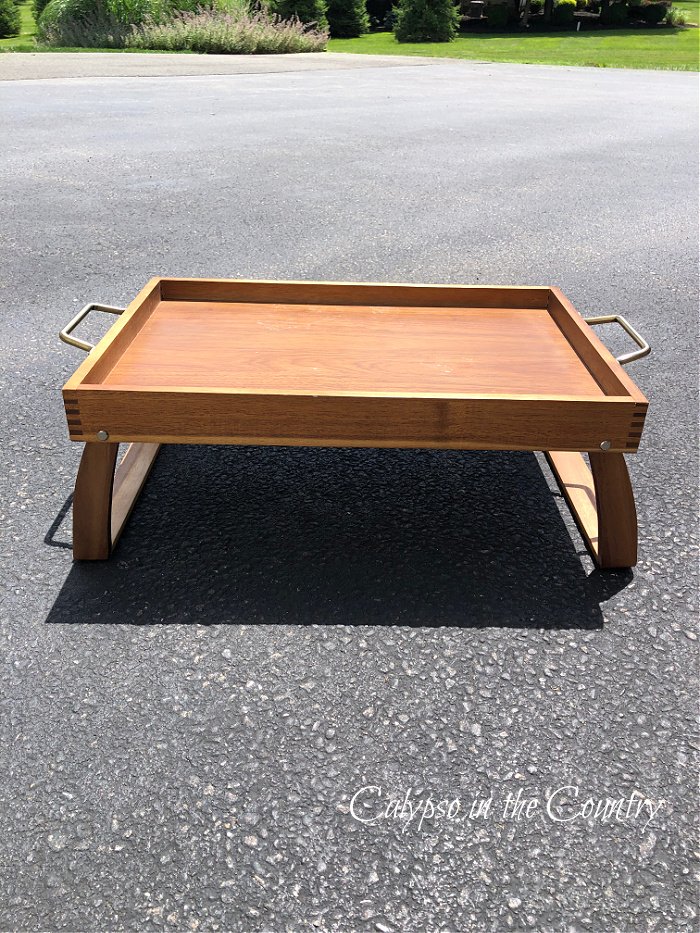
*Also, you could look for one in garage sales or thrift shops. Focus on the shape, not the color.
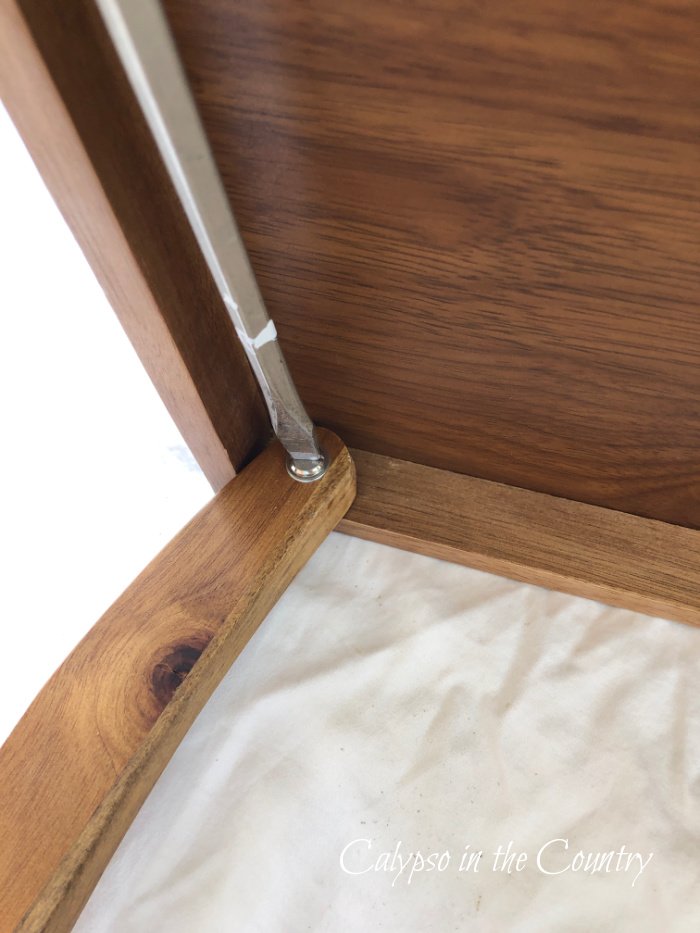
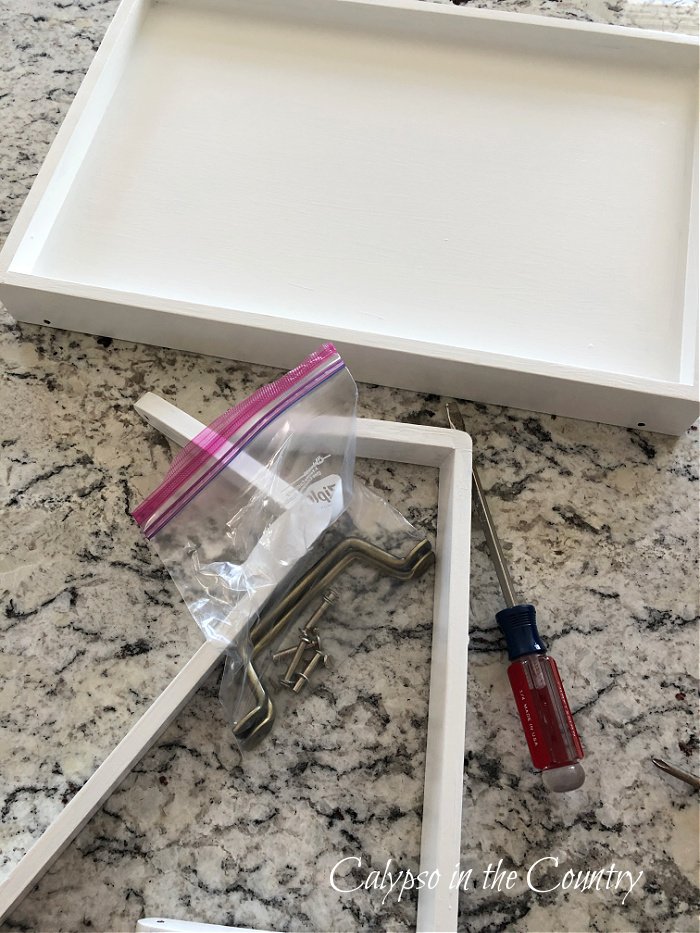
Remove the hardware from the tray…
This way, you don’t have to be careful about getting paint on the handles and bolts. Although, if you’re a neat painter, you could probably skip this step and leave them on.
Sand the wood with a fine sandpaper or sanding block…
This will roughen up the surface so the primer sticks better.
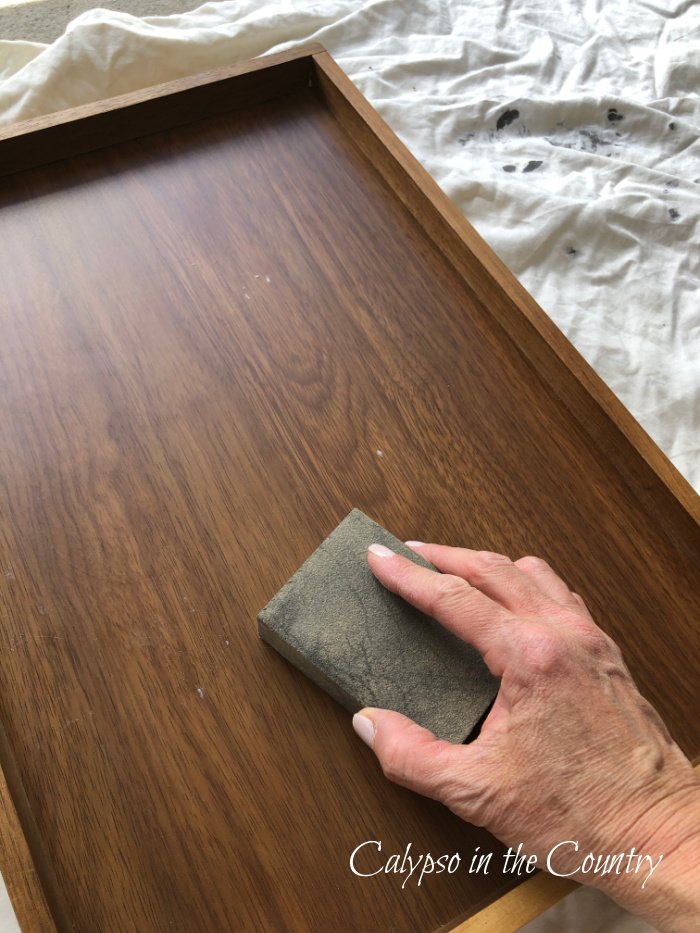
After sanding, wipe the tray with a damp cloth.
Once again, this will remove all the dust so you’re ready to paint.
Apply one coat of primer to the tray…
For this step, you don’t have to be super neat. Basically, you just want to cover the surface so the paint sticks. Let the primer dry about 4 hours. Since I primed my tray in our humid garage, I let it dry overnight just in case.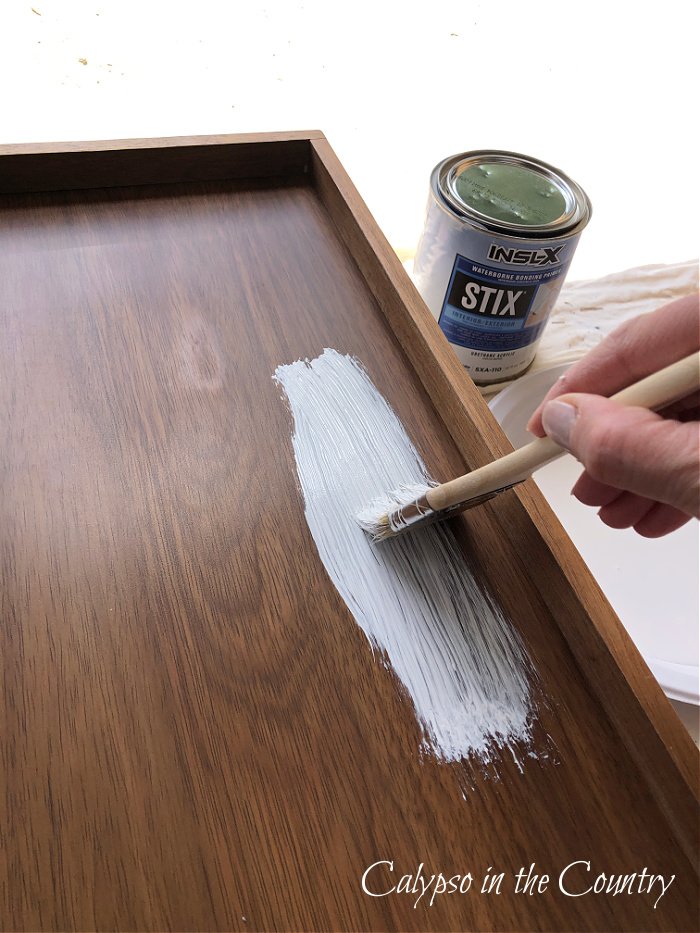
*Technically, you’re supposed to lightly sand and wipe the primer before painting but I skipped this step. Overall, I don’t think it mattered that much for this small project. If I were painting a larger piece of furniture, I probably would have followed the rules more.
Next, apply a coat of paint to the tray…
For my project, I used Benjamin Moore Advance Paint in the color “White”. (Yes, “White” is the actual name.) Recently, I painted a headboard using that paint and I had some left over. No need to buy extra for this small paint project! In addition to the headboard, I’ve also used the Advance line on a bathroom vanity, and have been very happy with the results. Not only does it dry with fewer streaks than other formulas but it holds up beautifully.
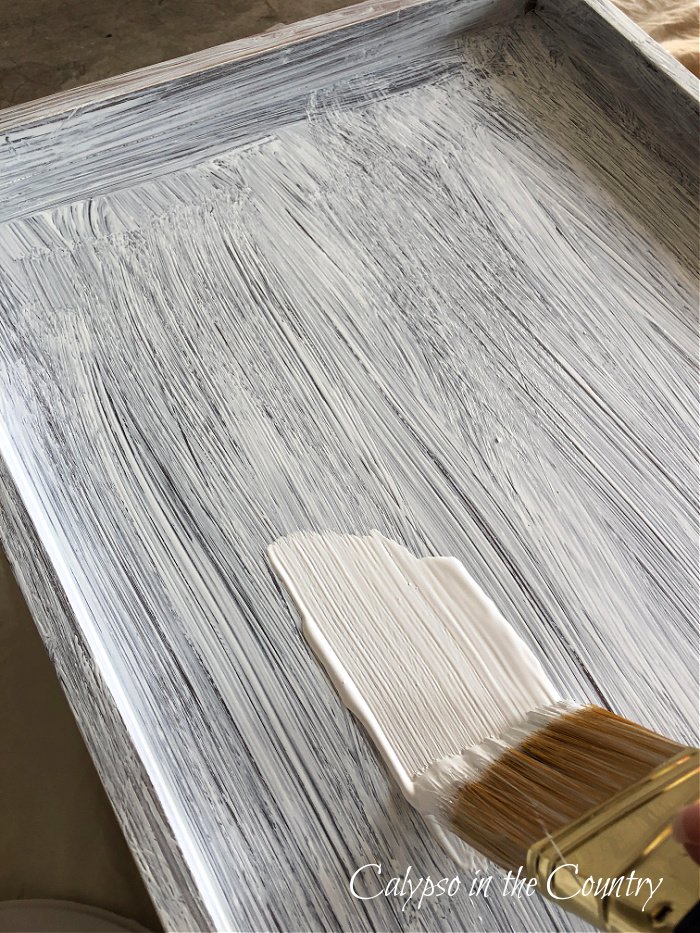
Let the first coat of paint dry for 16 hours.
On the Benjamin Moore Advance paint can, it states 16 hours but I just painted the next morning…it was close enough.
After the drying period, lightly sand away and drips.
And once again, wipe with a damp cloth.
Apply the second coat of paint.
And yes, wait about 16 hours if you want to make sure the paint isn’t tacky when you add back the hardware.
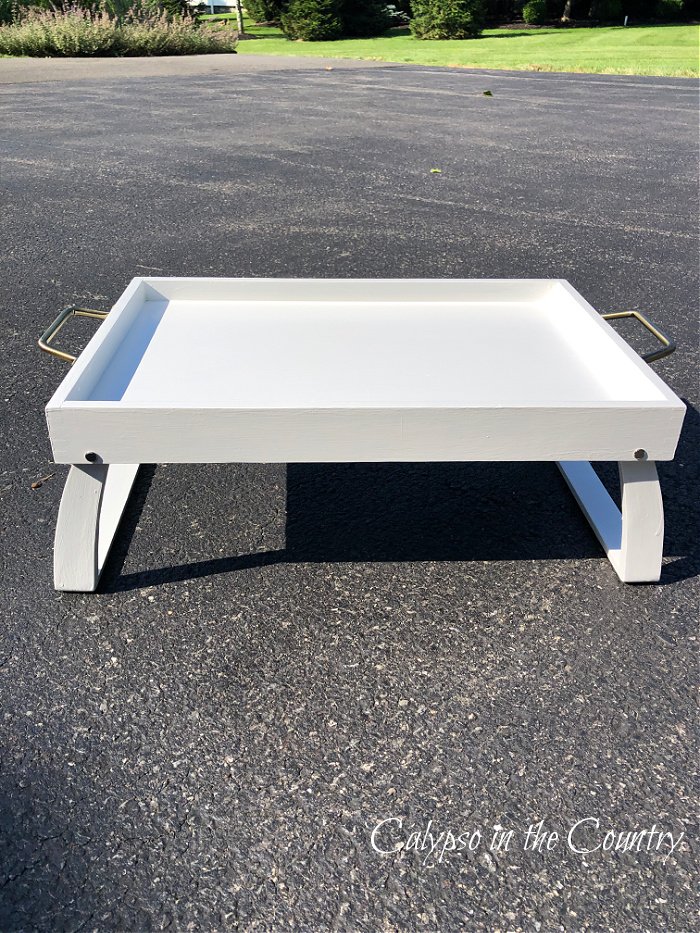
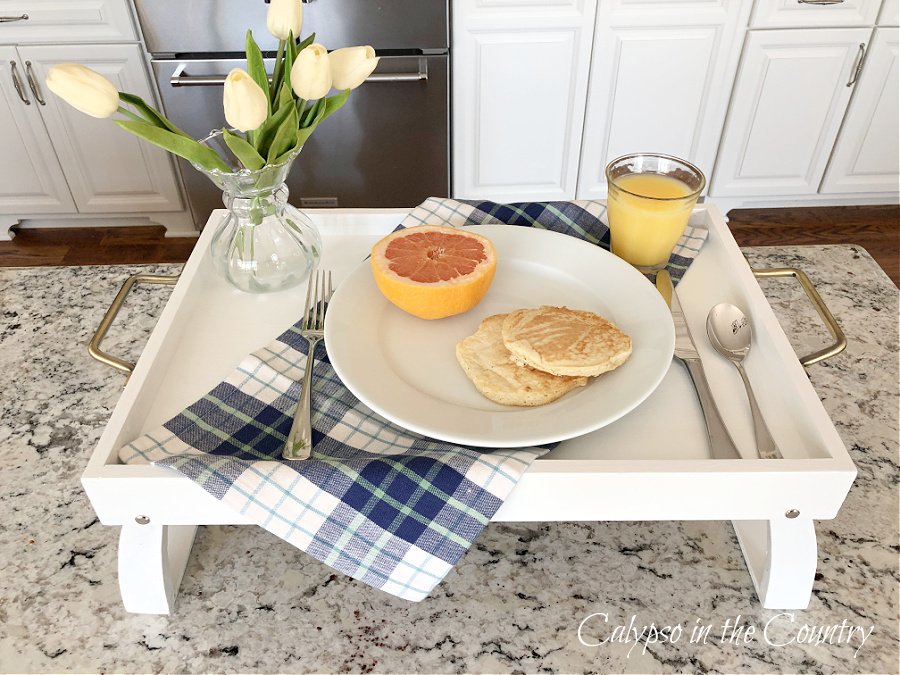
Once dry, you can reassemble the breakfast tray…
At this point, the breakfast tray makeover is almost complete…
Of course, don’t forget to decorate your breakfast tray!
Add a pretty napkin, some fruit, flowers…what ever makes you happy!
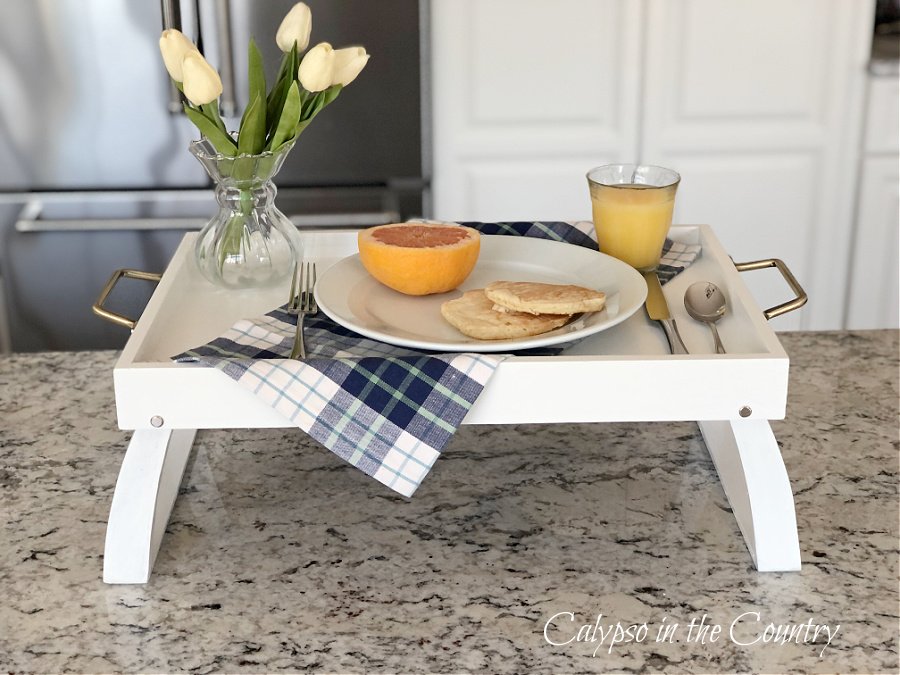
Even though I had fun painting my breakfast tray, the decorating part is always my favorite! This time, I just used what I had but the possibilities are endless. If you’ve visited my blog before, you know I love decorating with trays!
For the last step, enjoy breakfast in bed on your freshened up tray!
Hopefully, I’ve inspired you to makeover a breakfast tray or another item in your home!
As you’ve probably learned, paint really can transform!
Breakfast Tray Makeover Sources:
- Wooden tray – similar to mine, another similar option.
- Primer – Stix primer
- Paint – Benjamin Moore Advance – (Color White – semi-gloss)
- Paint brush – Wooster ( I like the way this one fits my hand…I used this for the paint and an old one for the primer)
If DIY isn’t your thing, here are some white breakfast tray shopping finds:
- For a charming look, here is a pretty rattan scalloped tray..
- Here’s another pretty rattan tray – rattan breakfast tray.
- If you don’t have time to make your own, here’s a classic white tray (that’s inexpensive too!)
Now, you have no excuse not to have breakfast in bed!
Have you attempted any makeover projects recently?

Follow along so you don’t miss a post!
Subscribe by email – HERE
Pinterest/ Instagram / Facebook / Twitter


I love this idea, Shelley and it turned out so beautifully! I’m going share your project with my readers and feature it in my weekly recap post on Saturday. I hope you have a happy 4th!
Thanks so much Jen! Wishing you and your family a happy 4th as well!
It came out great, Shelley! I like to do small DIY projects like that. This spring, I painted lots of flower pots. Very happy with their new look!
Thanks Amy – Easy DIYs are usually the only ones I attempt! Your flower pots sound great!
Wonderful tray makeover! I’m late on notification, but you were my bonus feature this past Sunday at Happiness is Homemade. Drop by my blog if you want to check it out. Thanks for sharing!
Thanks so much, Allyson! I’m honored that you included my tray makeover!