Before and After: Boys’ Bathroom Makeover (On a Budget)
Welcome, friends! Who’s up for a good before and after boys’ bathroom makeover?
*Please note that this post contains affiliate links. If you make a purchase after clicking my links below, I will receive a small commission (at no additional cost to you).
Today, I am excited to share a fun before and after project with you – our boys’ bathroom makeover!
Take a look at our budget friendly, teen bathroom transformation…
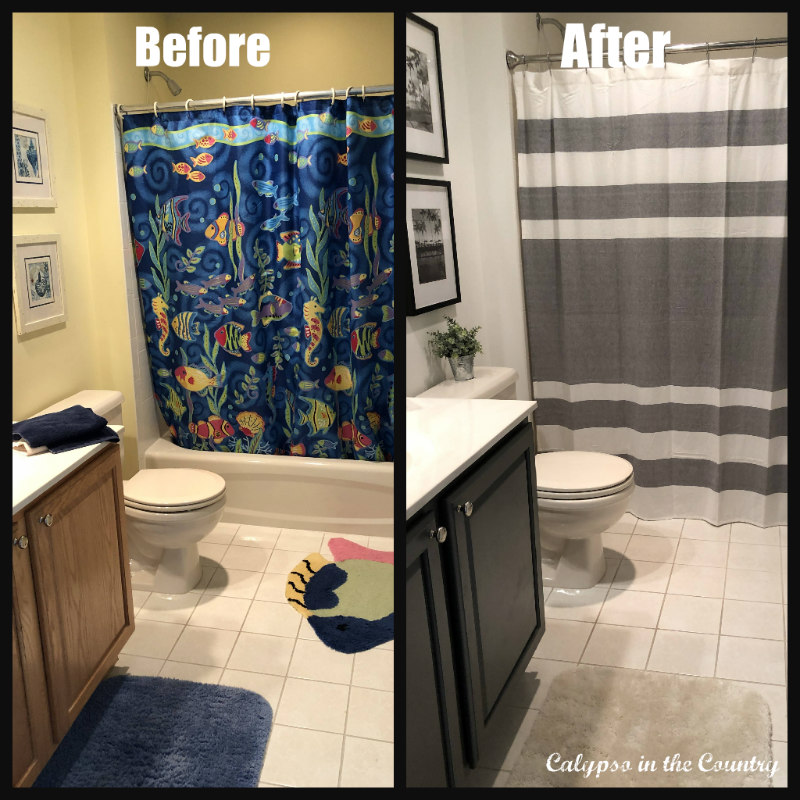
Since my boys are now teenagers, their childish fish-themed bathroom just wasn’t cutting it anymore. Actually, who am I kidding? The bathroom never looked good! After all this time, I finally decided to do something about their sad looking little bathroom. It had gotten to the point that the boys were totally embarrassed to let their friends in there. “It’s too babyish”, they’d say. Honestly, I can’t say I blamed them…
Dramatic boys’ bathroom updates on a budget…
Sometimes, you don’t need a full remodel…
Luckily, our bathroom tile was in good shape so I didn’t need to rip it out or do anything structural. Why spend all that extra money if you don’t have to? Instead, I focused on the cosmetic changes which didn’t cost too much. Simple updates like paint color can make a big impact when making over a bathroom.
Let’s start by looking at a scary “before” photo:
For many years, our boys bathroom was just a little too colorful for our liking…
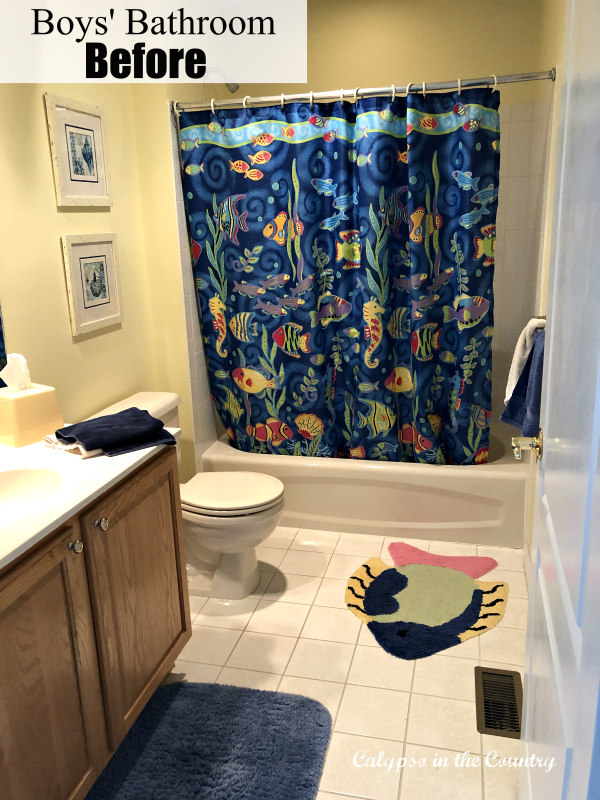
Yeah, I know…what was I thinking? Oh the horror…haha From what I can remember, I wanted their bathroom to feel bright and cheerful with a Caribbean vibe. After all, we vacation in the Caribbean once a year. Apparently, I wanted to bring some of that style home. Since there aren’t windows in this bathroom, I thought the yellow would make it feel lighter. Did I take into account that the tub and toilet were a bisque color?…No, I did not. To me, the yellow just looked horrible.
When the kids were little, I didn’t have time (or energy) to update the bathroom. Plus, when the boys were younger, they actually liked having a bright cheerful bathroom.
Fast forward about 12 years and our boys’ bathroom hadn’t changed. One day, I just couldn’t take it any longer and decided it was time for a makeover.
My plan to freshen up our boys’ bathroom:
From Caribbean nightmare to a cool teen bathroom…
- Paint the walls and ceiling (the ceiling had a water stain from an old leak in the attic)
- Replace shower curtain to something teen appropriate.
- Buy new accessories – towels, tissue box, etc.
- Replace toilet seat – because, you know…boys
- Replace the rugs
- Update the worn out builder-grade oak cabinet
Overall, the boys’ bathroom makeover took me a couple weeks and was totally worth it!
Are you ready to see the boys bathroom “after” photos?…
A dramatic transformation…
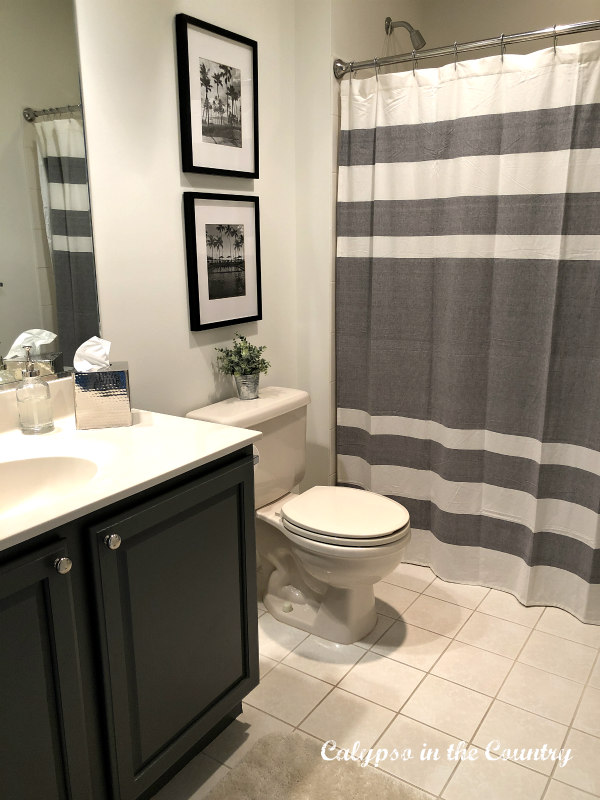
Consider the power of paint when updating a bathroom:
From a colorful Caribbean nightmare to a cool and sophisticated teen boys’ bathroom.
Finally, no more glaring yellow on the walls. First, I painted the ceiling and the walls – White Dove from Benjamin Moore (Aura Bath and Spa line) in the matte finish. Since the toilet and tub are a bisque color, I thought the creamy shade of White Dove worked well and didn’t clash like the yellow.
*Painting Tip – Since the Benjamin Moore – Aura Bath and Spa paint is specially formulated for steamy rooms, my paint dealer told me to let it cure for two weeks before letting the room get steamed up.
Because I was using a shade of white, I had decided to paint the ceiling and walls the same. It made the painting project much easier since I didn’t have to cut in at the ceiling line. With my back and neck problems, I wanted to spend as little time as possible reaching up. Plus, using the same color was cheaper because I didn’t have to buy additional paint for the ceiling.
Now, let’s take a look at the bathroom vanity:
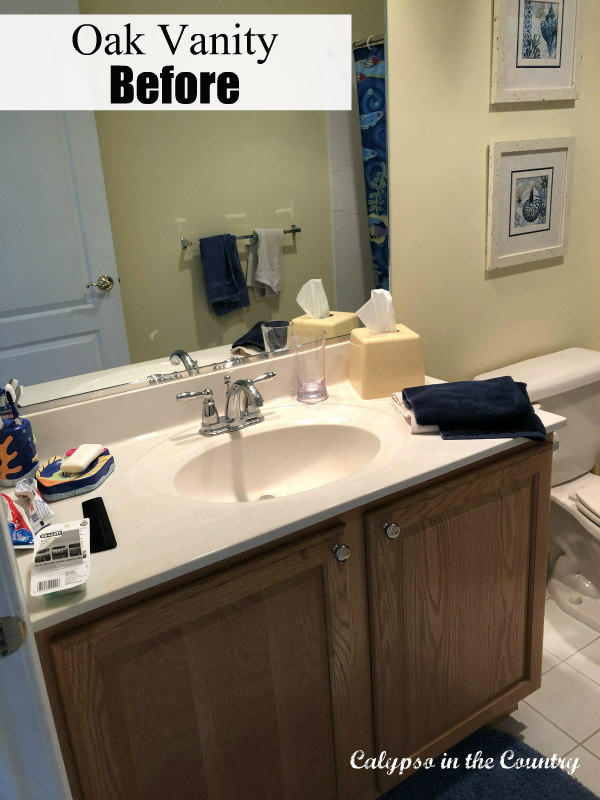
Oak vanity before…
Boy bathroom updates – painting the vanity:
After painting the walls, it was even more obvious the oak vanity needed an update.
With a couple coats of primer and paint, I was able to transform the look of the vanity as well. In the future, I might also frame out the builder-grade mirror but it’s fine for now.
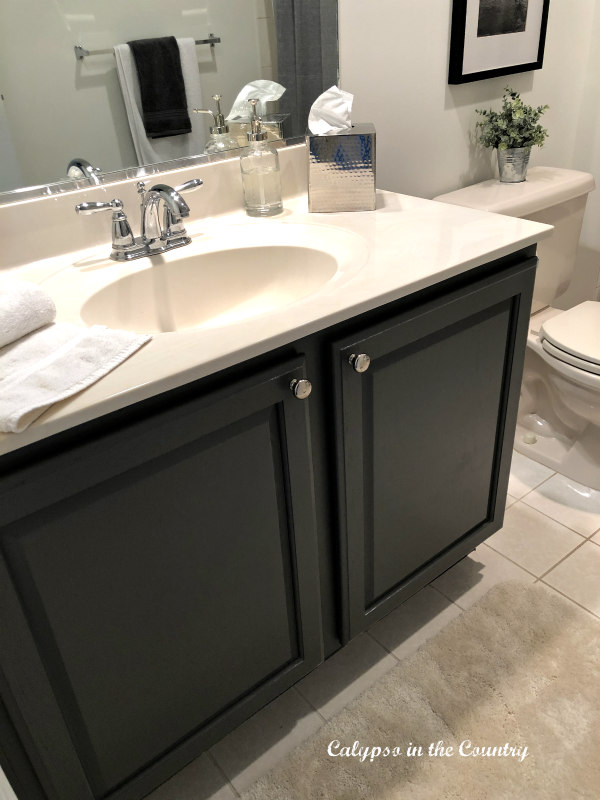
For the vanity color, I chose Benjamin Moore – Kendall Charcoal in a satin finish. In my opinion, it’s the perfect vanity color for a boy bathroom and I liked the contrast with the white walls. Also, I wanted the vanity to be a little darker than the gray in the new shower curtain. It had been years since I painted a cabinet and this time it seemed a little easier. Not that I plan on doing it all the time though!
If you want all the details on how I painted this vanity, be sure to read – How to Paint a Bathroom Vanity.
New accessories make a big difference in a boys bathroom:
Update the shower curtain to be more age appropriate…
Probably, our most dramatic change came with the shower curtain. After all, it’s the first thing you notice when you walk in the room.
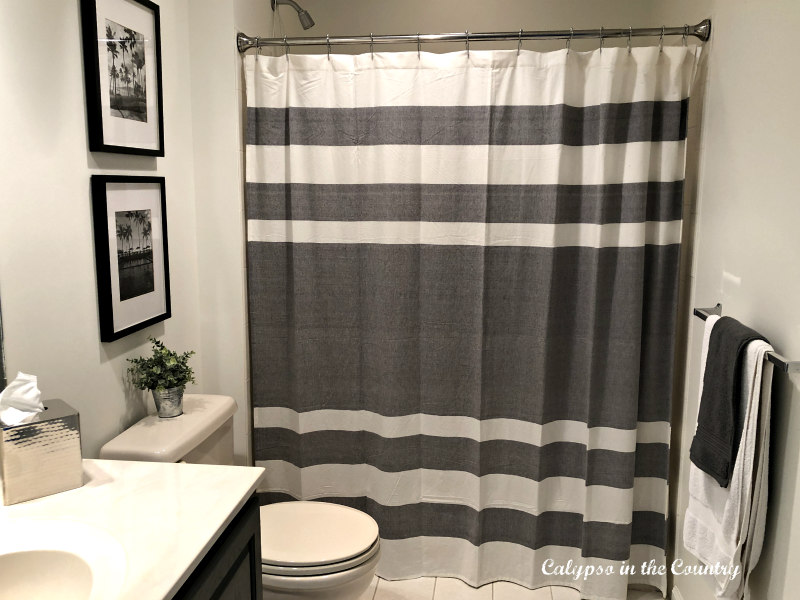
From crazy bright colors to calm gray and white, this change made a huge difference. On a successful trip to Homegoods, I found the shower curtain, rings and new pole. Obviously, Homegoods changes their inventory frequently, so I listed some similar shower curtains and accessories at the end of this blog post.
Coordinate the sink accessories…
For our boys bathroom, I chose chrome and white items for a fresh, clean look.
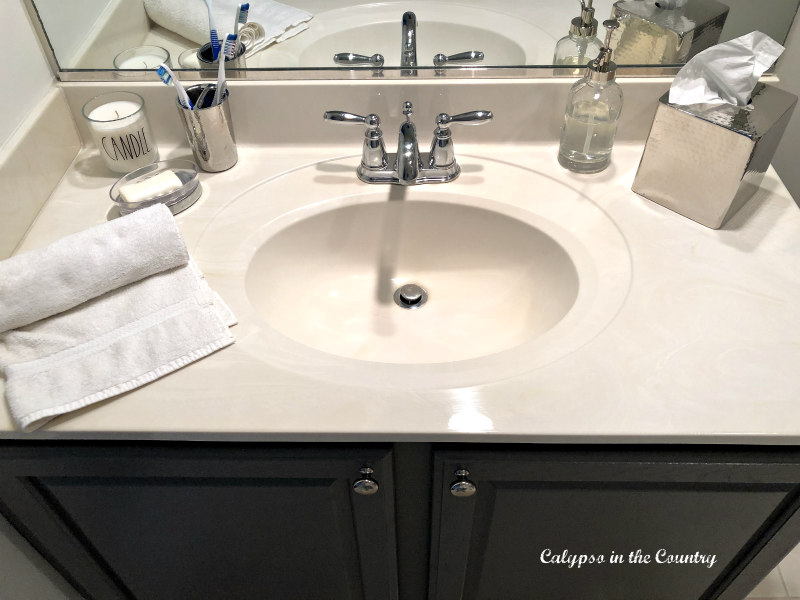
toothbrush holder / faucet / soap dispenser / similar tissue box
Due to a leak, we had already replaced the faucet a couple years ago. Luckily, the counter top was neutral and in good shape so I just bought some new accessories to freshen up this spot.
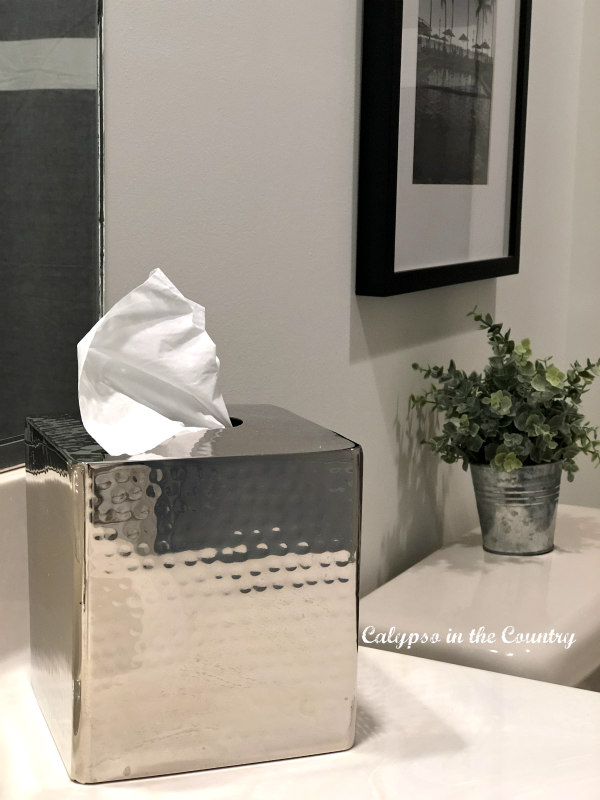
Since I wanted to continue with the look of shiny chrome from the faucet, I chose some chrome for the accessories like this tissue box. I like that it has a hammered look for some texture.
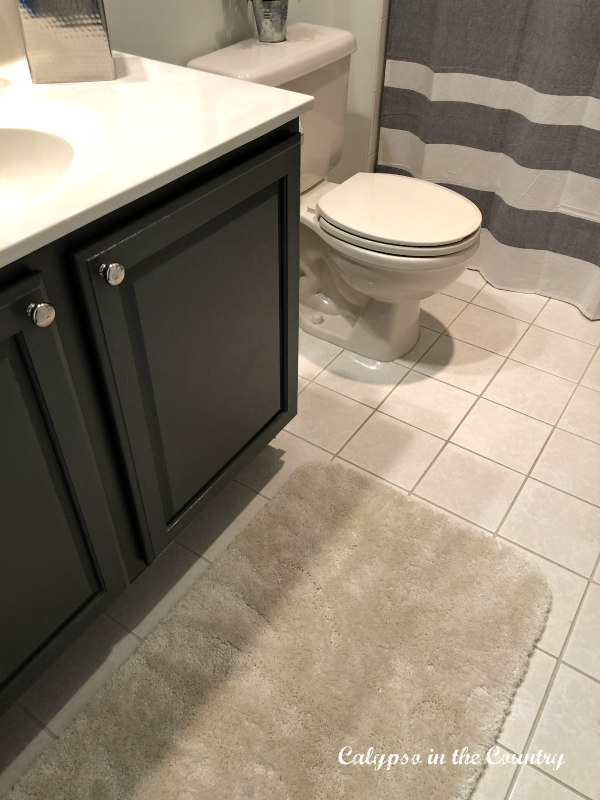
While we are discussing texture, the boys wanted a super soft rug in front of the sink. I can’t say I blame them, this one is so cushy on bare feet! Who says a boy bathroom can’t be a little luxurious?
Simple artwork for a boys bathroom:
Since every room should have a little black, I framed some tropical black and white photos above the toilet.
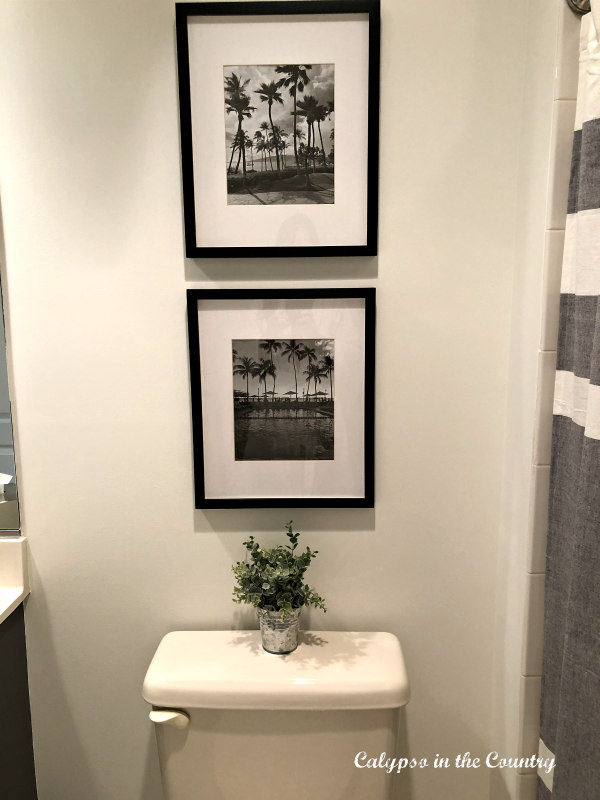
On our trip to Hawaii last year, I took these photos. Rather than buy art, I wanted the space to feel more personal and remind the boys of places they have traveled. Of course, I still need to hang another a black and white photo of the Caribbean on another wall. Believe me, that will be the only remaining Caribbean reference in this room!
*Money saving tip: When using black and white photos, just print them on paper directly from your computer. Why spend the extra money when you really can’t tell?!! This is also a good idea if you don’t want to commit to a certain photo. Just a heads up, we haven’t taken any long steamy showers in here yet so I am not sure how long the paper will hold up to a ton of humidity…a good reason to turn on the fan! Then again, the photos are behind glass so I am assuming they will be okay…
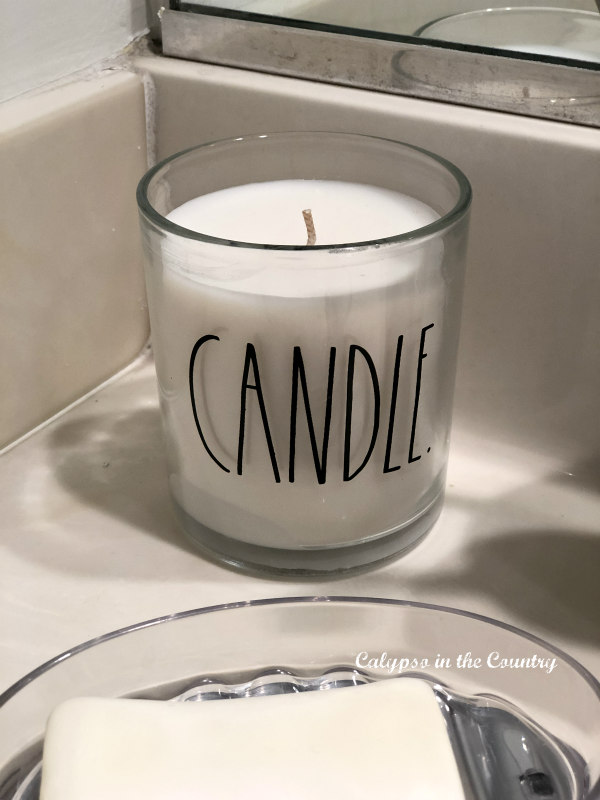
Rae Dunn candle – Homegoods
In my opinion, every bathroom should have a candle. For a boys’ bathroom, the scent (Sugar Bush) is subtle and just perfect. Nothing perfume-y in here! If you get a chance to go to Homegoods, check out all the Rae Dunn candles. They are so cute and smell heavenly!
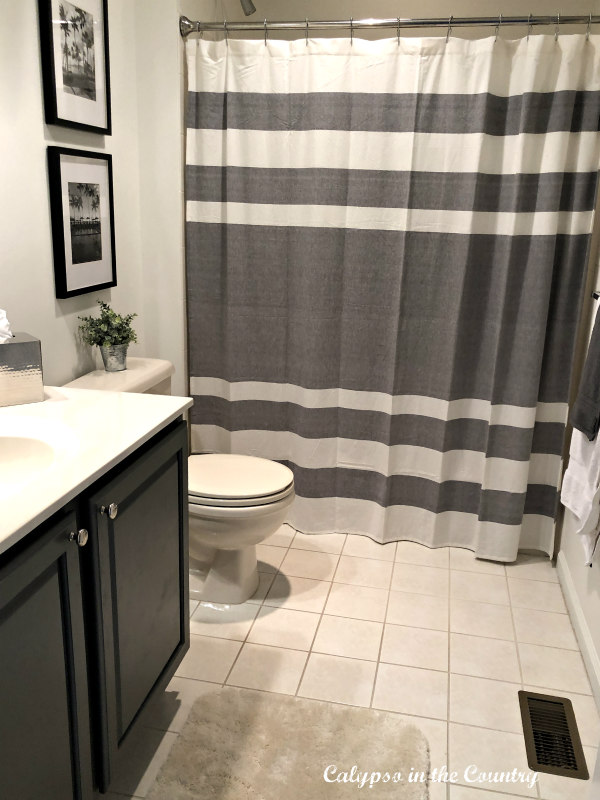
Shower curtain – Homegoods (similar shower curtain)
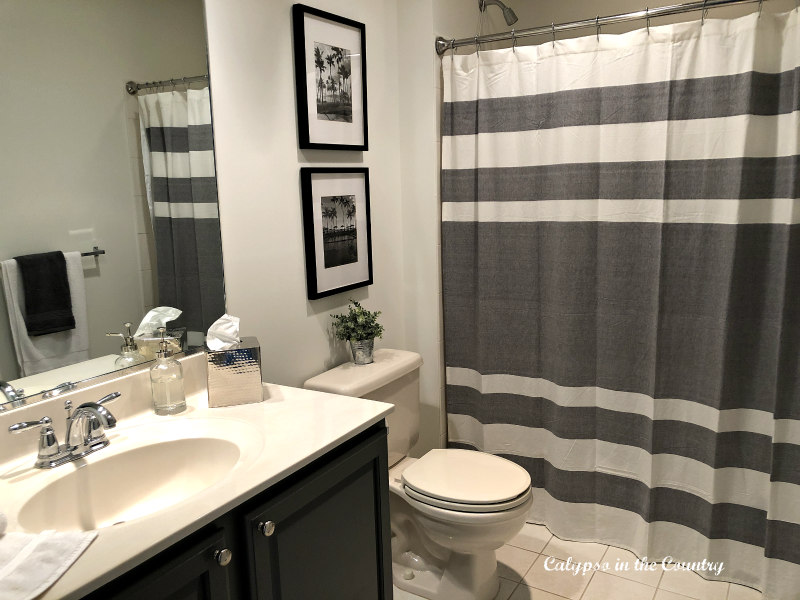
Our teen boys’ bathroom makeover is complete!
Hopefully, this boy bathroom makeover is proof that you don’t need to spend a ton of money for a fresh new look.
If your tile and main fixtures are still in good shape, you can extend the life of a bathroom with simple cosmetic changes…and a little work! Plus, something like painting bathroom cabinets can really be accomplished in a weekend.
Once again, let’s take a look at our boys’ bathroom before and after photos:
I hope I inspired you to take another look at an outdated bathroom in your home.
Do you have a boy who might like a bathroom update?
Maybe you can make some simple changes instead of tackling a full blown bathroom renovation. Wouldn’t you rather spend your money on a vacation or something?…Perhaps to the Caribbean -ha!
Sources for Boys’ Bathroom Makeover:
- Wall and Ceiling Paint – Benjamin Moore (Aura Line) – White Dove Matte finish
- Vanity Paint – Benjamin Moore – Kendall Charcoal in satin finish and this primer in white.
- Shower curtain – exact – Homegoods (similar masculine shower curtain).
- Creamy colored rug – similar rug
- Towels – similar dark gray towels
- Toilet Seat – Soft Close Toilet Seat in Bisque
- Candle – Homegoods
- Toothbrush holder – similar toothbrush holder or this holder
- Faucet – this faucet in chrome finish.
- Soap Dispenser – glass chrome soap dispenser.
- Tissue Box – similar version
- Black photo frames – exact gallery frames and similar picture frames.
- Faux plant – similar version.
What was your favorite update in our boy’s bathroom makeover?

Follow along so you don’t miss a post!
Subscribe by email – HERE
Pinterest/ Instagram / Facebook / Twitter


What an amazing transformation! I love the wall color, and also the darker cabinet. We were thinking of completely remodeling out 2 upstairs bathrooms, and wish we had just done it with the hurricane rebuild. But after some thought (and upcoming college tuition bills!), I think we will go with some updates, but not gutting the entire thing. We will replace toilet, tile and countertop. Also put in new faucets and paint the cabinet and trim. I think this will really update things!
Thank you so much, Tanya! It’s amazing what a little paint can do. I know what you mean about the upcoming college tuition – it’s sure coming fast, isn’t it? I think it’s great if you can get away with making some cosmetic changes instead of a full gut job. Bathrooms can be so expensive. Can’t wait to see what you end up doing!
Going with the white walls and ceiling was so smart, in my opinion. My 1880 home’s upstairs bathroom had a much needed overhaul 3 years ago, and I went with white walls, ceiling, trim and cabinets/sink, despite my contractor telling me I would hate it. Now a quick trip to Home Goods or their sister stores is all I need for an inexpensive makeover. I have a crazy hot pink floral shower curtain with matching accessories for Spring, a totally blue and white set for Summer and right now it is all sophisticated, with a white/tan/black Paris themed shower curtain, black rugs and I always keep the same white towels. I found a framed poster of the Eifel Tower at a local thrift store to finish it off. Each makeover cost me about $30 to $50 max, and I save what I love to reuse again, when I want a change.
You really show what can be done with some creativity, for very little money.
Thank you, Sue…I am happy to hear that you like the white walls. What a great idea to have different accessories for each season. It sounds like a perfect way to keep things feeling fresh without spending too much. We all know how expensive a full bathroom renovation can be so it helps to get creative. Thanks for stopping by and sharing your ideas!
That is a beautiful transformation! Our boys’ bathroom is bright turquoise with fish everywhere and I often think I should update it now that they’re older. Pinned.
Thank you so much for your sweet comment – and for pinning! It’s amazing how fast kids outgrow things! 😌
Very nice, Shelley. I am impressed. I need some energy too!
Thanks Bonnie! Yes, we all need some energy…lol
What a transformation, Shelley! I’ve had a boys’ bathroom on my to-do list for way too long. I just can’t get up the motivation to get it done. Buts seeing yours definitely helps! Great job.
Thanks Courtney…I figured it was time!
This looks AMAZING. That vanity looks like a brand new one.
Thanks! If you look up close you can still see a little bit of the grain but overall I am very happy with how it turned out.
Wowza! The after picture looks so grown up and sophisticated. I especially love the trip to Hawaii photos instead of spending money in art work. Makes me want to paint our cabinets black. Our master bathroom is sooooo outdated. Why do the people that pay for the updates leave their rooms last on the list?! 😂
Thanks Cindy! I thought the Hawaii pictures would be a fun personal touch. Oh, and the cabinet is actually a charcoal gray. It just looks black because there is no natural light in there and my photography isn’t exactly professional…lol. Don’t feel bad about your master, our master bathroom is so outdated too. We almost renovated it this year but ended up putting it off. The shower was so bad that my husband had to scrape out the grout and re-caulk it. It will hold us over for awhile but something needs to be done soon. Thanks again for your sweet comment!
What an improvement! I know that you are thrilled with the result of your hard work.
Thanks, Paula! Yes, I am very happy with how it turned out…and so are the boys!
Hi! What brand primer did you use on the cabinet? I’m finally ready to tackle our bath cabinets, thanks to you.
That’s great! I am so happy to hear I inspired you! Since I had several questions, I am working on a cabinet painting post that I will publish tomorrow. In the meantime, I used Stix primer for mine. Hope that helps! Happy painting…
Wow what a transformation!! I think my favorite part is the painting, both the vanity and the walls. I chuckled while reading this because I used to have a tropical fish bathroom for my kids too. I’m curious to how the bathroom paint holds up to moisture from steamy showers. Perhaps you could do a follow up post sometime. Thanks!
Thank you – I guess those tropical fish bathrooms were popular! Yes, I will follow up about the paint at some point. My Benjamin Moore guy told me the Aura paint (used on the walls) is specially formulated for bathrooms so I am assuming it will hold up. Thanks for stopping by and for commenting! Enjoy your evening.
This is just awesome. Wow, wow, wow! I’m so proud for you–you’ve created an awesome space.
Thanks so much for joining the Grace at Home party at Imparting Grace. I’m featuring you this week!
Thank you so much, Richella! I had fun doing it – and my boys are finally happy with their bathroom. Thanks so much for the feature!
What a transformation, Shelley! Love the grays and whites… and the touch of black is perfect. I think I need to check out the RD candles, too! Blessed to have you at Tuesday Turn About!
Thanks so much, Julie! Yes, those Rae Dunn candles are great!
Gorgeous renovation. I love the power of paint. I will be featuring this tonight at my Fall into Fall party that opens at 8pm EST. Please stop by and pick up an I’ve Been Featured button. Thanks. http://diybydesign.blogspot.com
Thanks so much, Judy…yes, the power of paint! I will definitely swing by tonight. Thanks again!
Hi Shelley,
What type of light fixture do you have above the sink? Is it chrome or an oil-rubbed bronze color?
It’s just recessed lighting so no fixture. I’d probably choose chrome for this bathroom though. Hope that helps!