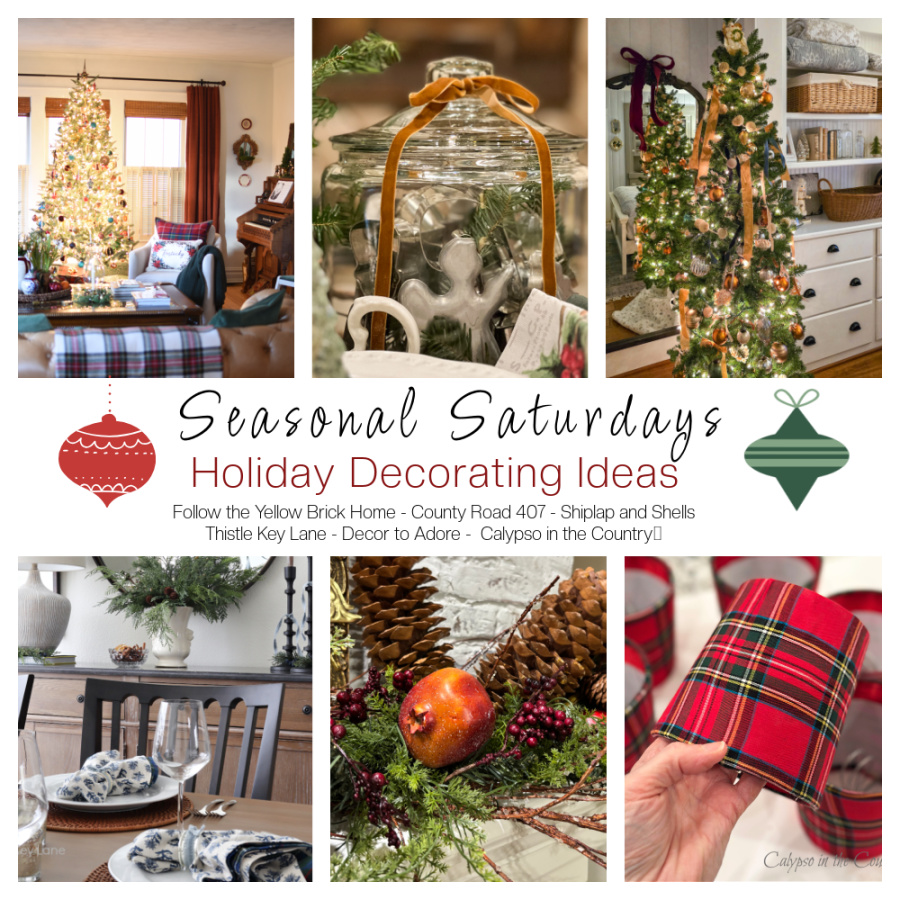
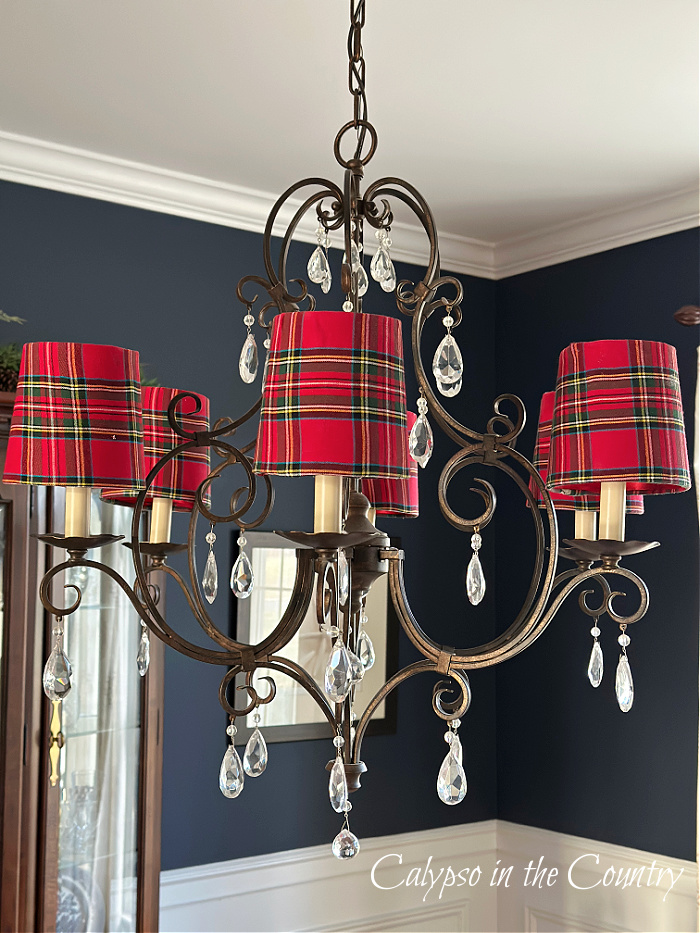
DIY Plaid Lampshades (for a Ralph Lauren Christmas)
Welcome, friends and happy December to you! If you’re looking for early winter and Christmas decorating ideas, I’ve got some inspiration for you! Today, I’m joining a few blogger friends for a Seasonal Saturdays mini blog hop. For my contribution, I’m sharing my DIY plaid lampshades to celebrate the Ralph Lauren Christmas trend!
*For your convenience, please note that this post may contain affiliate links. If you make a purchase after clicking my links below, I will receive a small commission (at no additional cost to you).
December DIY and Decorating Ideas:
Come get inspired!
*Before we get started, I want to thank Amber from Follow the Yellow Brick Home for hosting this December blog hop! If you don’t already follow her, head over to her blog (1st stop on the blog hop). This week, Amber is sharing some gorgeous Ralph Lauren and Little Women inspired decor!
If you’re arriving from Decor to Adore, welcome! Laura always does a beautiful job with her seasonal decorating. And I’m sure you loved her Williamsburg Christmas living room!
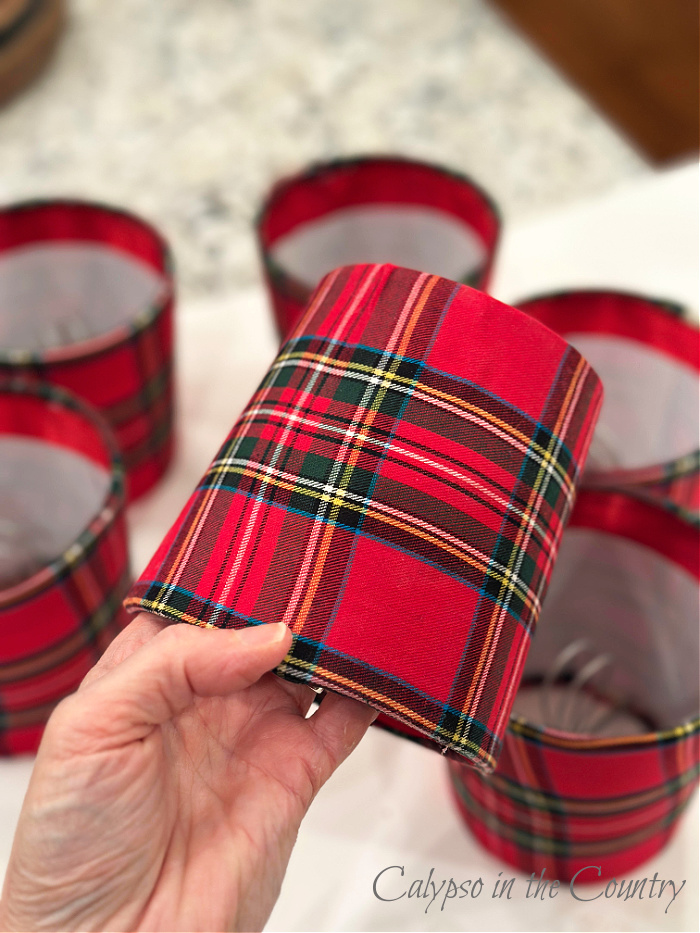
My DIY Plaid Lampshades Project:
A budget friendly way to create a Ralph Lauren Christmas vibe…
As you’ve probably noticed, Ralph Lauren Christmas is super popular this year! To add touches of his style to your home, you can’t go wrong with plaid. Originally, I had planned to buy plaid lampshades for my dining room chandelier but the few I found online were more than I wanted to spend. So…I decided to attempt a DIY project!
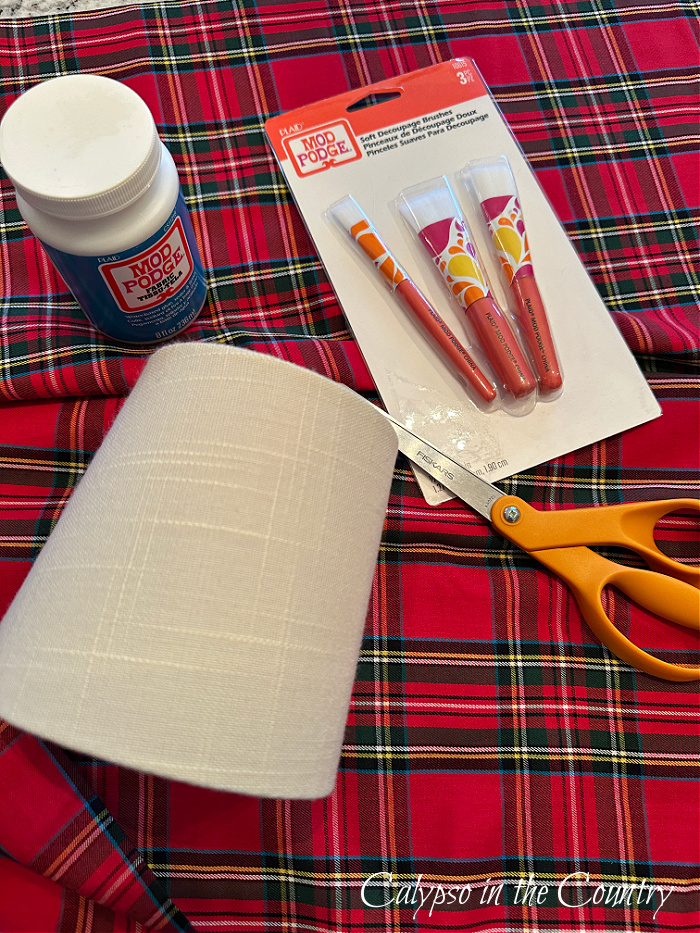
Supplies List:
- Chandelier shades (these are the ones I bought).
- Lightweight fabric (exact plaid fabric) (similar fabric)
- Fabric Scissors (same as mine)
- Spray adhesive or fabric glue (I used fabric Mod Podge)
- Pencil
- Fabric marker or chalk
- Optional – ribbon for trim
My Step By Step Instructions for DIY Plaid Lampshades:
Choose a Fabric:
- Find a lightweight fabric that’s easy to work with.
- Consider a solid fabric if you don’t want to bother aligning patterns.
- Iron your fabric if needed.
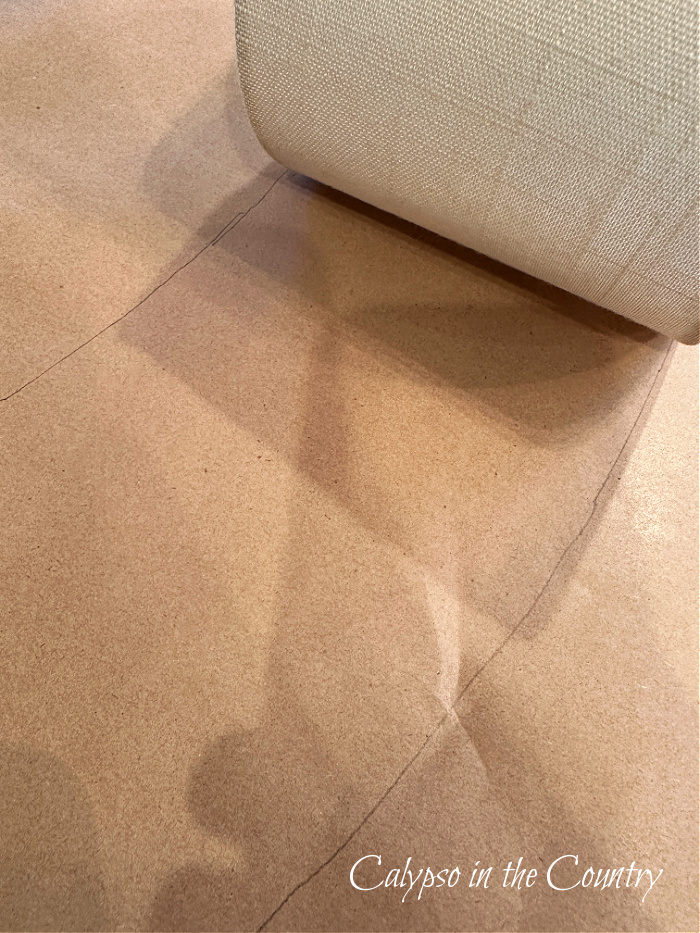
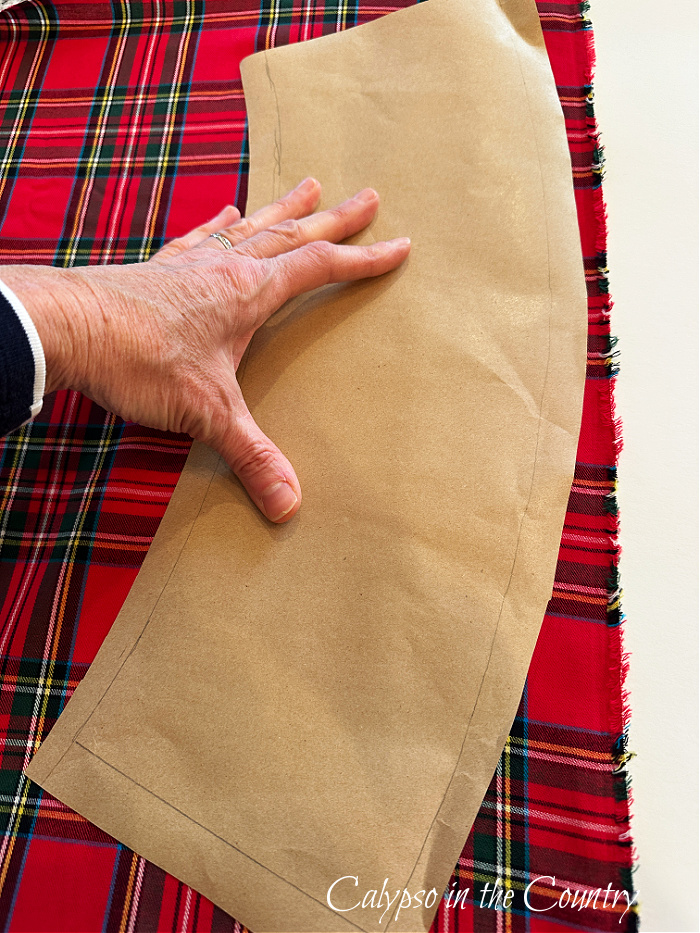
Make a Template for the Shades:
- Roll your shade along a piece of kraft paper while tracing the edges as you go.
- Add 1/2 to 1 inch extra around all sides so you can fold over.
- Cut out the paper template.
Cut Your Fabric:
- Lay your template on your fabric (pin or weigh it down if that helps)
- Cut your fabric pieces.
- Make sure you align the pattern so each shade looks the same.
*Beginners Mistake Side Note:
This is where I messed up a little. Because of the busy pattern, it was hard to get each piece to match when I was cutting with the curve of the template. After awhile, I got frustrated and decided to cut each fabric piece in a rectangle instead of the curve from the lampshade. Yes, it was easier to line up the lines at the bottom of the shade but it wasn’t the best idea. Unfortunately, on the back of each shade, the fabric wasn’t very straight so I ended up overlapping it.
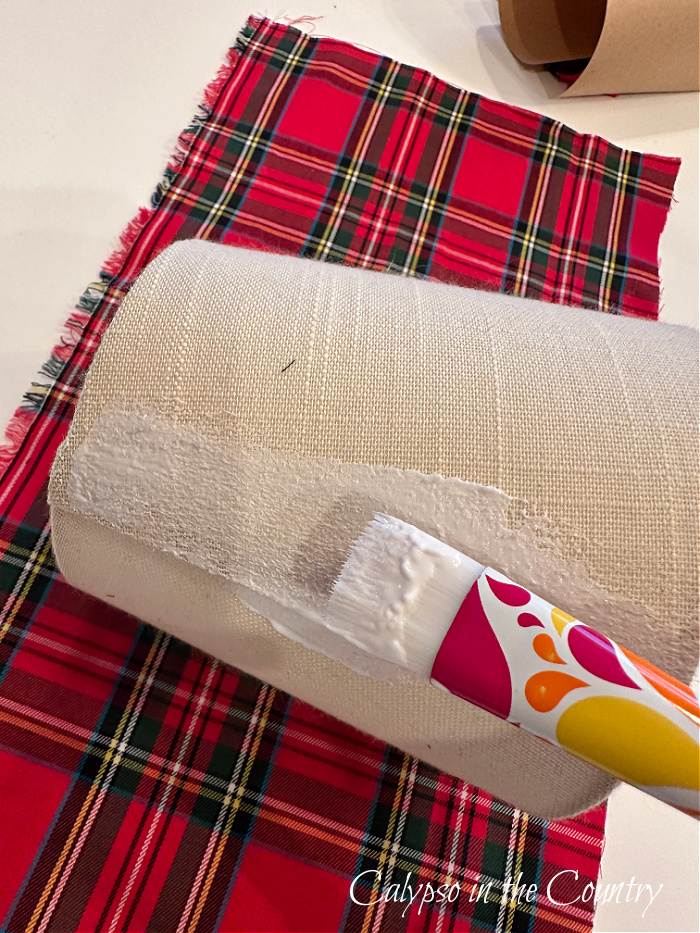
Attach the Fabric to the Lampshade:
- Brush the fabric Mod Podge onto the shade.
- Slowly roll the shade while keeping the fabric taut.
- To keep the lines from getting wavy, gently smooth the fabric as you roll the shade.
- Fold over and glue the back seem.
*This step definitely takes some patience if you’re dealing with plaid or any repeating pattern.
Alternate Adhesive:
As another option, you could use a spray adhesive. In that case, you would spray lightly and roll and pull the fabric like I did with the Mod Podge.
Trim and Fold over the Edges:
- With the extra fabric on the top and bottom, fold the fabric to the inside of the shade.
- Glue neatly along the inside of the shade.
- You can choose to use clothespins or clips to hold until the glue sets.
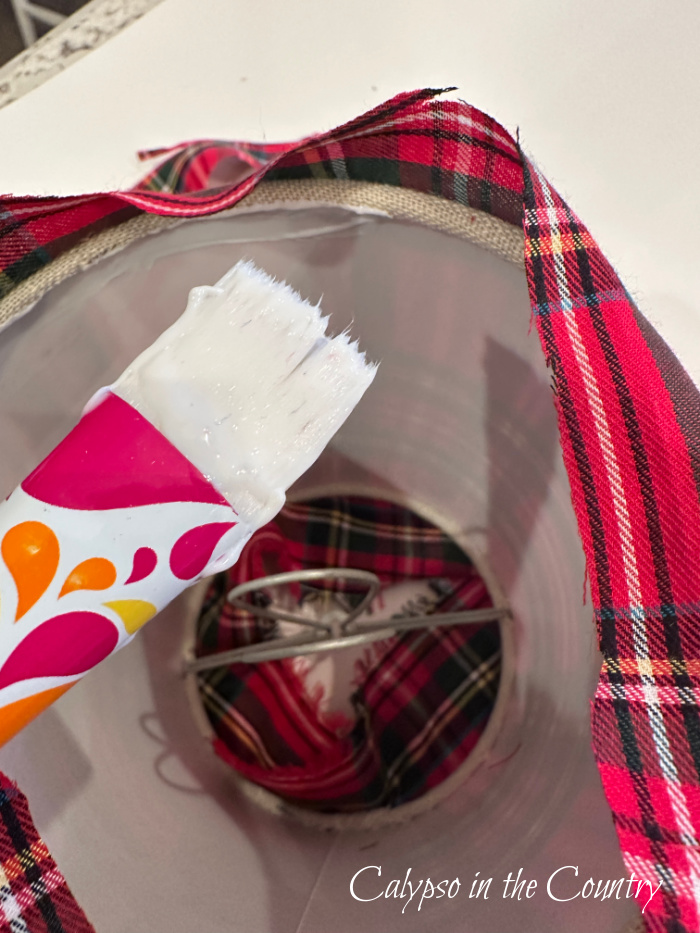
Optional Trim:
To cover any messy edges, consider using a ribbon to make a trim on the inside.

Attach the Lampshades to Your Chandelier!
When you turn on the lights, you might see a shadow from where the ribbon trim is attached underneath the shades. For my shades, it was subtle so it didn’t bother me too much.
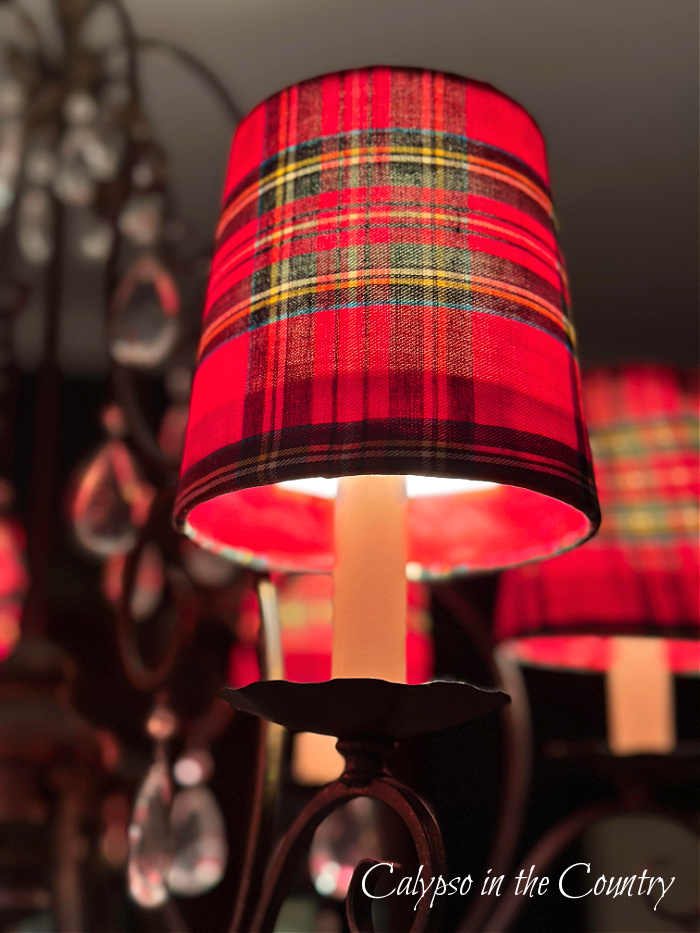
Plus, during the day you don’t see any of the shadows. Overall, they came out how I had planned.
Styling Ideas:
Since Ralph Lauren usually adorns his chandeliers with plenty of Christmas greenery, I’ll be adding that as well. *This Wednesday, I’ll also be sharing more photos of the room for our Christmas tour. So, be sure to come back for more holiday inspiration!
Some tips and takeaways from this DIY lampshade project:
- While attaching the fabric, pay attention to the pattern (so it doesn’t look wavy!)
- Drum shades are easier to work with than taper shades.
- To make things even easier, choose a solid fabric.
- If the original shade is dark, choose a dark fabric.
- If your back seam isn’t perfect, make sure you turn the shades around on the chandelier!
Thanks for stopping by to see my DIY plaid lampshades!
Hopefully, my tutorial will inspire you to create something similar for your home!
- To see how the rest of the room turned out, read – Ralph Lauren Christmas Dining Room & Tour!
- For even more of my plaid Christmas ideas, be sure to read – Christmas Decorating with Plaid!
Shop chandelier shades (if you don’t have time to DIY):

And for even more Seasonal Saturday inspiration, be sure to visit my blogger friends!
If you’re following in order, Shiplap and Shells is next on the list! I’m sure you’re going to love Kim’s seasonal decor!


Shelley, you are spot on for the season with your plaid lampshades! I have to say working with plaid is not easy, but you have done an exceptional job with the pattern. The lampshades look so beautiful in your navy dining room! Excellent tip on using ribbon too!
Thanks Michelle! Yes, for my first attempt at this DIY, a solid pattern would have been a little easier. Glad you liked how they turned out! Great hopping with you!
What a great tutorial Shelley! I love how you can customize a look for every theme. Happy Christmas!
Thanks Laura! Maybe I’ll really work on my skills so I can make some for whatever next year’s trend ends up being…because you’ll know there will be one! Merry Christmas!
What a fun way to add plaid to your dining room! I need to do something with my little shades but couldn’t figure out what to do. I need to get some plain ones and recover them! Thanks for the tutorial. I’ve always been intimidated that but you made it look easy. Love it! Merry Christmas. pinned
Thanks Cindy! It’s been awhile since I’ve attempted a decorating DIY! Wishing you a Merry Christmas!
I am pinning this for sure! If your chandelier already looks this beautiful, I can’t wait to see it with greenery! I was going to share my plaid lampshade I made using ribbon but didn’t get any pictures. I love a good DIY to get the look for less. I recently painted some lampshades black after seeing how expensive black lamp shades are.
I am looking forward to seeing more of your Christmas decor! I always love your dining room!
Merry Christmas!
Thanks Amber! I’m working on the greenery right now…which is challenging due to the shape of my chandelier. I’m sure your black lampshades are beautiful too! Thanks again for hosting this holiday season!
This lampshade tutorial couldn’t have come at a more perfect time! I just found two lamps at TJ Maxx and knew I needed different lampshades. It’s amazing how much the plaid makes everything look so festive! Thanks for sharing my friend. Merry Christmas!
Thanks Kim! What a great coincidence! I imagine regular size lampshades will even be easier to cover than the chandelier ones! Merry Christmas!